Creating a stunning outdoor space doesn’t require a hefty budget or professional expertise. Your small patio can become a luxurious retreat with strategic DIY projects that deliver maximum impact.
The secret lies in choosing the right projects. Smart design choices can transform even the tiniest patio into an elegant garden sanctuary.
These 12 small patio garden DIY ideas prove that style and sophistication are achievable on any budget. Each project focuses on delivering an expensive look while remaining accessible to DIY beginners.
Shop Patio Decor Must-Have
We earn a commission if you make a purchase, at no additional cost to you.


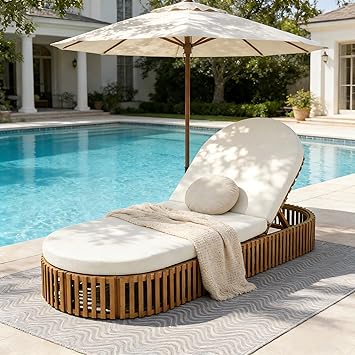
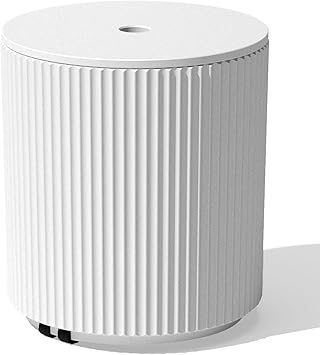


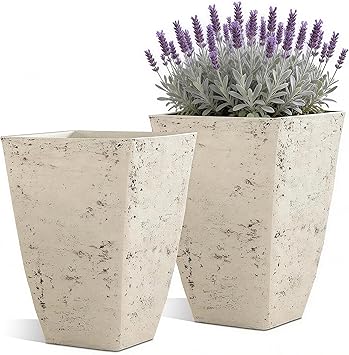


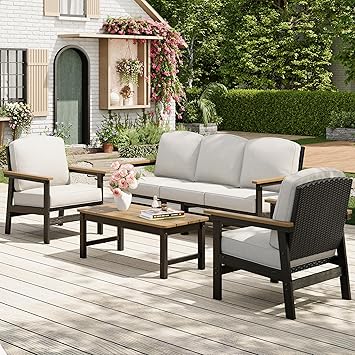


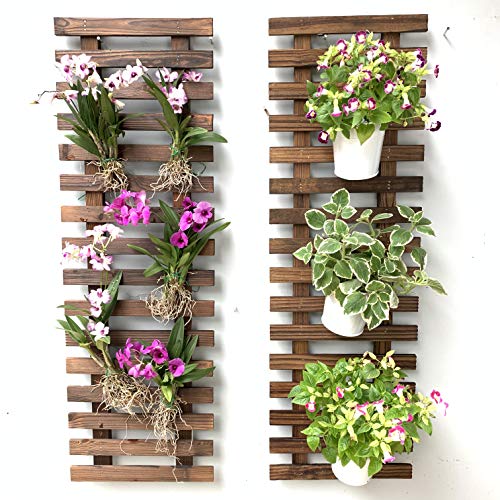
Create a Living Wall with Vertical Planters

Vertical gardens maximize your planting space while creating a stunning focal point. This approach works perfectly for small spaces where the ground area is limited.
The vertical design draws the eye upward. This visual trick makes your patio space appear larger and more sophisticated.
Wall-mounted planters cost a fraction of built-in garden beds. You can create custom arrangements using repurposed materials like wooden pallets or hanging shoe organizers.
Materials You’ll Need
- Wall-mounted planter boxes or hanging containers
- Potting soil and drainage materials
- Drill and appropriate wall anchors
- Level for precise placement
- Selection of trailing and upright plants

Step-by-Step Installation
Start by measuring your wall space carefully. Plan the layout on paper before drilling any holes.
Install the strongest brackets at the bottom. These will support the weight of soil and water.
Work your way up the wall systematically. Ensure each planter is level before moving to the next one.
Pro Tip: Opt for a lightweight potting mix to minimize wall stress. Add perlite for improved drainage and reduced weight.
Select plants that thrive in your patio’s light conditions. Combine different textures and colors for visual interest throughout the seasons.
Install a Magical String Light Canopy

String lights transform any outdoor space into an enchanting evening retreat. This simple addition creates instant ambiance that rivals expensive landscape lighting.
The overhead canopy effect adds architectural interest. Your patio gains dimension and intimacy without permanent structures.
Planning Your Light Design
Measure the area where you want lights. Consider the power source location and plan your cable runs accordingly.
Choose between solar-powered and electric options. Solar lights offer easier installation, while electric provides consistent brightness.

Installation Points
Identify sturdy anchor points around your patio perimeter. Walls, posts, and strong fence sections work best.
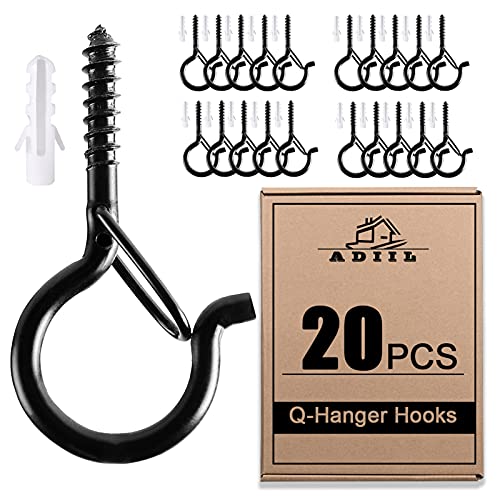
Install heavy-duty hooks rated for outdoor use. These prevent sagging and ensure long-term durability.
Creating the Pattern
Zigzag patterns create the most visual impact. Vary the heights slightly for natural-looking draping.
Leave some slack in the lines. This prevents excessive tension and allows for natural movement in the wind.
Modern LED string lights consume minimal electricity. They deliver thousands of hours of beautiful illumination without significant energy costs.

Bulb Selection Tips
Edison-style bulbs create a vintage look. They cast warm, flattering light that makes your space feel inviting.
Globe bulbs offer softer illumination. These work well for intimate seating areas where you want gentle lighting.
Transform Concrete with Painted Patterns
Plain concrete doesn’t have to stay boring. Painted floor designs deliver the look of expensive tile or custom stonework at a tiny fraction of the cost.

The right paint and pattern can completely change your patio’s character. Geometric designs add modern sophistication while stenciled patterns create Mediterranean charm.
Surface Preparation
Clean the concrete thoroughly with a pressure washer. Remove all dirt, oil, and loose material for proper paint adhesion.
Repair any cracks or damage before painting. Fill holes with concrete patch and allow complete drying time.
Etch the surface with a concrete cleaner. This step ensures the primer bonds properly to the slab.
Painting Process

Apply concrete primer first. This creates a base layer that helps paint adhere and last longer.
Use stencils for intricate patterns. Tape them securely to prevent paint bleeding under the edges.
Work in sections to maintain consistency. Complete one full pattern repeat before moving to the next area.
Pattern Ideas That Look Expensive
- Moroccan tile designs with bold colors
- Black and white checkerboard for classic elegance
- Faux stone with natural color variations
- Geometric hexagons in complementary tones
- Border patterns framing solid center sections
Seal the finished design with outdoor concrete sealer. This protective layer prevents fading and makes cleaning effortless.
Weather Consideration: Plan your painting project during dry weather. You need at least 48 hours without rain for proper curing.
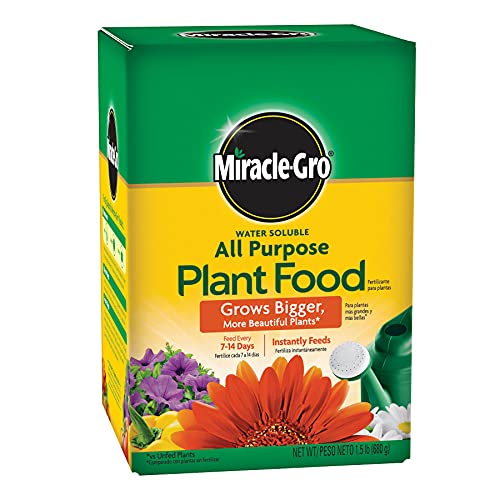
Shop DIY Garden Must-Have








Build Custom Cedar Planter Boxes

Cedar planters add warmth and natural beauty to any patio space. The material ages gracefully, developing a rich patina that looks increasingly elegant over time.
Building your own planters costs significantly less than purchasing ready-made versions. You also get exact sizes that fit your specific space perfectly.
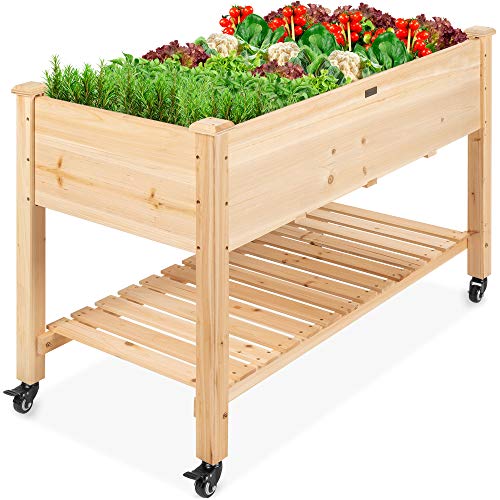
Why Cedar Works Best
Cedar naturally resists rot and insects. These properties make it ideal for outdoor planting containers that face constant moisture.
The wood has beautiful grain patterns. Even a simple construction looks sophisticated when the material itself is attractive.
Cedar doesn’t require paint or stain. The natural finish saves money and maintenance time while looking refined.
Basic Construction Steps
Cut cedar boards to your desired dimensions. Standard heights range from twelve to twenty-four inches for most plants.
Assemble the sides using outdoor wood screws. Pre-drill holes to prevent splitting the wood during assembly.
Add a bottom with drainage holes. Space holes every six inches for proper water flow.

Size Recommendations for Small Patios
- Corner planters: 18×18 inches to maximize space efficiency
- Linear boxes: 36×12 inches along railings or walls
- Tiered designs: Multiple small boxes at varying heights
- Window box style: 24×8 inches for narrow ledges
Line the interior with landscape fabric. This prevents soil from washing through drainage holes while allowing water to escape.

Fill boxes with quality potting mix rather than garden soil. The lighter medium reduces weight and improves drainage for container gardening success.
Add a Simple Pergola for Shade and Style
A basic pergola creates architectural interest while providing essential shade. This structure defines your patio space and offers support for climbing plants.

Building a pergola seems intimidating but requires only basic carpentry skills. The investment in materials pays off through years of functional beauty.
Planning Your Structure
Measure your patio area carefully. The pergola should cover the main seating zone without overwhelming the space.
Check local building codes before starting. Some areas require permits for permanent outdoor structures.
Material Options
Pressure-Treated Lumber
Most affordable option for pergola construction. Requires painting or staining but offers excellent durability.
Posts should be 4×4 inches minimum. Beams work well at 2×6 or 2×8 dimensions for adequate strength.
Cedar or Redwood
Premium appearance with natural weather resistance. Higher initial cost but minimal maintenance requirements.
The beautiful aging process develops character. The wood weathers to attractive silver-gray tones over time.

Assembly Tips
Set posts in concrete for stability. Dig holes below your area’s frost line to prevent shifting.
Level everything carefully as you build. Small errors compound quickly in structural projects.

Space the cross beams twelve to sixteen inches apart. This creates attractive shadow patterns while allowing climbing plants to weave through.
Enhancing Your Pergola
- Train climbing roses or clematis up the posts
- Hang outdoor curtains from the beams for privacy
- Add string lights along the underside of beams
- Install a retractable shade cloth for full sun protection
- Mount hanging planters from cross beams
The structure becomes more beautiful as plants mature. Flowering vines add color and fragrance while providing natural shade.
Craft Stylish Furniture from Wooden Pallets

Wooden pallet furniture delivers industrial-chic style at virtually no cost. Free or cheap pallets transform into benches, coffee tables, and vertical gardens with minimal effort.
The rustic texture of pallet wood adds character. Your outdoor furniture will have unique imperfections that give it an authentic, expensive-looking personality.
Sourcing Quality Pallets
Look for pallets marked “HT” for heat-treated. Avoid those marked “MB” as they contain harmful chemicals.
Inspect for sturdy construction and minimal damage. The best pallets have tightly spaced boards without excessive wear.
Simple Pallet Bench
Stack two pallets for the seat base. Add a third pallet vertically for the backrest.
Secure with long screws or bolts. Sand all surfaces thoroughly to prevent splinters.
Add outdoor cushions for comfort. The cushions also introduce color and softness to the rustic wood.

Finishing Techniques
Sand the wood progressively with finer grits. Start with 80-grit and finish with 120-grit for smooth surfaces.
Apply outdoor wood stain in your chosen color. Dark walnut tones create a sophisticated contrast with outdoor greenery.

Pallet Project Ideas
- Coffee table with glass top insert
- Corner sectional seating arrangement
- Vertical herb garden with pocket planters
- Rolling bar cart for outdoor entertaining
- Daybed or lounger with cushioned mattress
Seal finished pieces with waterproof outdoor sealant. This protection extends the life of your furniture through multiple seasons.
Install a Soothing Water Feature
Water features add luxury ambiance through sound and movement. The gentle trickling creates a peaceful atmosphere that masks urban noise.

Simple fountain kits cost less than a hundred dollars. The impact on your patio’s atmosphere far exceeds this minimal investment.
Types of Easy Water Features
Container Fountains
Use a large ceramic pot or urn. Add a small pump and decorative stones for an elegant focal point.
Bamboo Spouts
Authentic Asian garden aesthetic. Water pours from bamboo into a basin, creating meditative sounds.
Stacked Stone
Natural rock appearance with water cascading over multiple levels. Works beautifully with surrounding plantings.
Installation Basics
Position your feature near an electrical outlet. Solar-powered options exist but may lack consistent performance.
Create a level base for stability. Even small tilts can cause water to overflow or pumps to run dry.

Install the pump according to the manufacturer’s directions. Secure all tubing connections to prevent leaks.
Add plants around the base. Moisture-loving varieties like hostas or ferns thrive near water features.
Use distilled water to prevent mineral buildup. This reduces maintenance and keeps the pump functioning smoothly.
Maintenance Tips
- Clean the pump intake monthly to prevent clogging
- Top off water weekly during the hot summer months
- Winterize features in freezing climates by draining completely
- Add mosquito dunks to prevent insect breeding
- Wipe down surfaces to prevent algae growth
Cost-Saving Idea: Create your own water feature using a decorative bowl, a small pump, and river rocks. Total investment under fifty dollars with stunning results.
Define Space with an Outdoor Rug

Outdoor rugs anchor your patio design while adding color and comfort. This simple addition makes concrete or wood decking feel like an elegant outdoor room.
Modern outdoor rugs resist fading and mildew. They deliver the look of expensive indoor rugs while withstanding weather exposure.
Choosing the Right Rug
Measure your seating area before shopping. The rug should extend at least eighteen inches beyond furniture on all sides.
Select patterns that complement your style. Geometric designs suit modern spaces while botanical prints enhance traditional gardens.
Material Considerations
Polypropylene rugs offer durability and easy cleaning. These synthetic fibers resist moisture and dry quickly after rain.
Natural fibers like jute create organic texture. These work best in covered patio areas with protection from direct weather.

Styling Your Rug
Layer rugs for dimension in larger spaces. A smaller accent rug over a neutral base adds visual interest.
Coordinate colors with cushions and planters. This creates a cohesive design that looks professionally planned.

Use rug pads underneath for stability. These prevent slipping and protect both the rug and your patio surface.
Maintenance for Longevity
- Shake out debris weekly to prevent dirt buildup
- Hose down monthly with fresh water
- Spot clean spills immediately with mild soap
- Store during winter in harsh climates
- Rotate quarterly to ensure even wear patterns
Quality outdoor rugs last multiple seasons. The upfront investment pays dividends through years of beautiful, functional use.
Design a Stunning Container Garden
Strategic container arrangements create lush gardens in minimal space. Varying heights, textures, and colors produce depth that rivals in-ground planting beds.

Containers offer flexibility that permanent beds cannot match. You can rearrange designs seasonally and move plants to optimize light exposure.
The Thriller, Filler, Spiller Method
This classic design formula creates professional-looking arrangements. Each container should include plants from all three categories.
Thriller
Tall, dramatic center plant that draws attention. Examples include ornamental grasses, small trees, or upright flowers.
Filler
Medium-height plants that fill space around the thriller. These add color and mass to the arrangement.
Spiller
Trailing plants that cascade over container edges. These soften hard lines and add movement.
Container Selection Strategy

Mix materials for visual interest. Combine ceramic, terracotta, and metal containers in complementary colors.
Vary sizes dramatically for impact. Group small pots with large urns to create dynamic compositions.


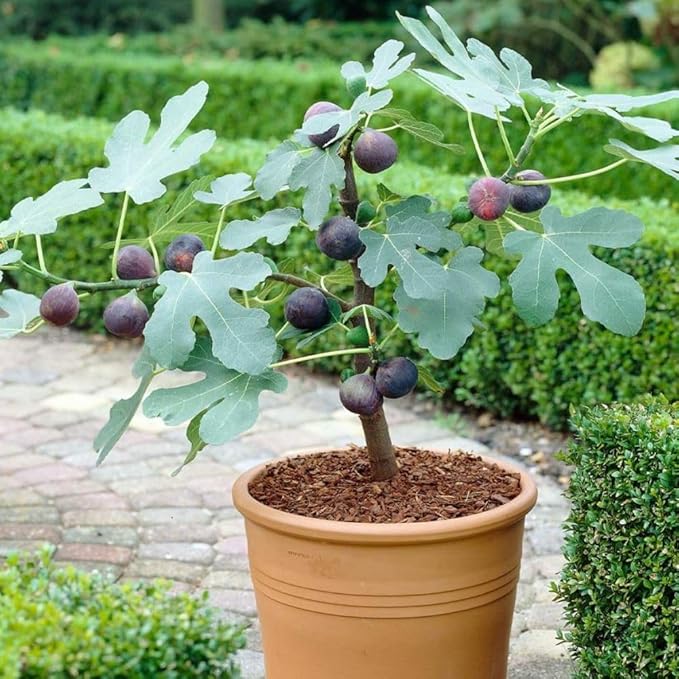


Grouping Principles
- Arrange in odd numbers for natural appeal
- Place the tallest containers at the back or center
- Leave space between pots for air circulation
- Create color echoes across multiple containers
- Include at least one statement piece per grouping
Elevate some containers on plant stands or overturned pots. This creates additional height variation without purchasing more large planters.
Plant Combinations That Work
Pair plants with similar water and light needs. This simplifies care while ensuring everything thrives together.
Combine textures for visual richness. Mix feathery ferns with bold hostas or spiky grasses with rounded blooms.

Seasonal Rotation
Plan for year-round interest by swapping seasonal plants. Spring bulbs give way to summer annuals, then fall mums, and winter evergreens.
Keep thriller plants permanent while changing fillers and spillers. This approach maintains structure while refreshing the look affordably.
Build a Living Privacy Screen
Privacy screens create intimacy while blocking unwanted views. Living versions using plants deliver beauty along with function.

Solid fence panels can feel claustrophobic in small spaces. Greenery achieves the same privacy goal while maintaining an airy, garden atmosphere.

Trellis Installation
Attach lattice panels to your existing fence or wall. This creates vertical growing space for climbing plants without consuming floor area.
Freestanding trellis panels work where permanent installation isn’t possible. Weight the bases with large planters for stability.
Space panels to allow plant growth between them. This creates depth and prevents a flat, one-dimensional appearance.
Paint or stain the trellis to match your patio aesthetic. Black creates dramatic contrast while natural wood blends into garden settings.

Best Plants for Privacy
Fast-Growing Climbers
- Clematis varieties for colorful blooms and quick coverage
- Climbing roses offering flowers and thorny deterrence
- Jasmine provides scent along with screening
- Honeysuckle attracts hummingbirds with fragrant flowers
- Passion vine delivers exotic blooms in warm climates

Train vines along the trellis as they grow. Use soft plant ties to guide stems without damaging tender growth.
Container Options for Mobility
Plant bamboo in large containers for portable privacy. Clumping varieties stay contained while growing tall quickly.
Arrange multiple tall containers in a row. Fill with ornamental grasses or evergreen shrubs for year-round screening.
Budget Tip: Buy small starter plants instead of mature specimens. Climbing plants grow rapidly and will fill in within one season at a fraction of the cost.
Create a Cozy Fire Pit Gathering Spot

Fire pits extend patio season into cooler months. The flickering flames create a natural gathering point for family and friends.
Simple fire pit designs require minimal construction skills. Stacked stone or metal bowl styles deliver impressive results with straightforward assembly.
Fire Pit Options for Small Spaces
Portable Metal Bowl
Ready to use immediately with no installation required. Move easily for cleaning or storage during the off-season.
Available in numerous styles from modern to rustic. Prices start under one hundred dollars for quality options.
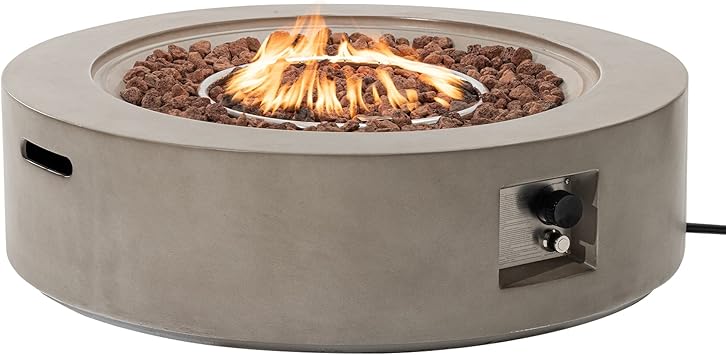
Built-In Stone Ring
Permanent installation using retaining wall blocks. Creates a custom size perfectly fitted to your space.
Stack blocks in a circular pattern using construction adhesive. Add a gravel base for drainage and fire safety.
Safety Considerations
Position fire pits at least ten feet from structures. Check local fire codes and obtain required permits before building.
Install on a non-flammable surface like gravel or pavers. Never place directly on wood decking or combustible materials.

Fuel Options
- Wood logs for a traditional crackling fire experience
- Propane for clean burning and easy on-off control
- Natural gas if you have existing line access
- Fire glass for a modern aesthetic with gas systems
- Bioethanol for smokeless, ventless options
Surround the area with heat-resistant seating. Metal or stone furniture works better than wooden pieces that might scorch.
Enhancing the Atmosphere
Add outdoor cushions and blankets for comfort. These invite guests to linger longer on cool evenings.
Install low-voltage path lighting for safety. Subtle illumination prevents tripping while maintaining ambiance.

Keep firewood stacked neatly in a decorative holder. This functional element doubles as attractive natural decor.
Include side tables within reach of each seat. Guests need convenient spots for drinks and snacks during gatherings.
The fire pit becomes your patio’s heart during fall and spring. This relatively simple addition dramatically increases outdoor living time throughout the year.
Establish a Functional Herb Garden Station
Herb gardens combine beauty with practicality. Fresh herbs elevate cooking while providing wonderful fragrance throughout your patio space.

Compact herb gardens fit perfectly in small patio areas. Vertical arrangements maximize production while minimizing footprint.
Selecting Herbs for Your Climate
Choose perennial herbs for long-term value. Rosemary, thyme, and sage return year after year in most climates.
Add annual varieties for summer abundance. Basil, cilantro, and dill grow quickly and produce heavily during warm months.


Sun Requirements
Full Sun Herbs (6+ hours)
- Basil in multiple flavorful varieties
- Rosemary for year-round harvesting
- Oregano spreading to fill containers
- Thyme forms fragrant mats
- Sage offers ornamental and culinary value
Partial Shade Herbs (3-6 hours)
- Parsley providing continuous fresh leaves
- Mint growing vigorously in containers
- Chives producing edible flowers
- Cilantro thriving in cooler conditions
- Lemon balm offering citrus scent
Container Garden Setup

Use individual pots for each herb type. This prevents aggressive growers like mint from overtaking companions.
Group containers on tiered plant stands. The vertical arrangement creates visual interest while keeping herbs within easy reach.
Planting Tips for Success
- Use a well-draining potting mix with perlite added
- Ensure each pot has adequate drainage holes
- Start with healthy transplants rather than seeds
- Water when the top inch of soil feels dry
- Fertilize monthly with diluted organic fertilizer
- Harvest regularly to encourage bushy growth
Label each container clearly. Decorative markers help identify herbs while adding charm to your garden station.
Chef’s Tip: Position the herb garden near your kitchen door. The convenience encourages regular use in cooking and ensures the freshest possible flavor.
Extending the Season
Bring tender herbs indoors before the first frost. Basil, lemon verbena, and tropical varieties continue producing on sunny windowsills.
Protect hardy herbs with mulch in winter. Rosemary, thyme, and sage survive cold weather with minimal care in most regions.
Expand Space with Strategic Mirror Placement

Outdoor mirrors create the illusion of a larger space through reflection. This designer trick makes small patios feel significantly more expansive.
Weatherproof mirrors designed for outdoor use resist moisture damage. These specialized products maintain their reflective quality through seasons of weather exposure.
Placement Strategies
Position mirrors to reflect the most attractive views. Capture lush plantings or architectural features rather than blank walls or utility areas.
Mount at eye level for maximum impact. The reflection should appear as a natural extension of your patio space.

Angle mirrors slightly downward. This captures more of your beautiful plantings and less of the sky.
Frame mirrors in weather-resistant materials. Powder-coated metal or sealed wood frames withstand outdoor conditions while adding decorative appeal.
Creating Focal Points
Use mirrors as garden art. Ornate frames transform functional mirrors into stunning outdoor sculptures.
Arrange mirrors in gallery groupings. Multiple smaller mirrors create dynamic visual interest on large blank walls.
Mirror Styles That Work Outdoors
- Arched garden mirrors suggesting doorways or windows
- Sunburst designs adding metallic glamour
- Vintage window frames with mirror inserts
- Convex mirrors providing wider field of reflection
- Mosaic-framed mirrors introduce color and pattern

Position mirrors to bounce light into shaded areas. The reflected sunlight brightens dark corners and helps shade-tolerant plants thrive.
Installation Tips
Use heavy-duty mounting hardware rated for outdoor use. Mirrors can be heavy and require secure attachment points.
Apply silicone sealant around frame edges. This extra protection prevents moisture from seeping behind the mirror surface.
Safety Note: Avoid positioning mirrors where they might reflect sun directly into windows or create hot spots that could damage plants or start fires.
Clean mirrors monthly with glass cleaner. Regular maintenance keeps reflections crisp and maximizes the space-expanding effect.
Transform Your Small Patio Into a Luxury Retreat

These twelve small patio garden DIY ideas prove that limited space doesn’t mean limited style. Each project delivers a high-end appearance without requiring professional skills or excessive spending.
The key lies in strategic choices. Focus on projects that maximize visual impact while working within your space and budget constraints.
Start with one or two ideas that excite you most. Building your dream patio happens gradually through consistent small improvements.
Remember that the best outdoor spaces reflect personal style. Adapt these ideas to match your aesthetic preferences and functional needs.
Your small patio holds enormous potential. With creativity and effort, you can create an outdoor sanctuary that rivals expensive professional designs.

These projects prove that thoughtful design matters more than square footage. Small spaces become intimate retreats when planned carefully and styled with intention.
The outdoor room you’ve always wanted is achievable starting today. Choose your first project and begin transforming your patio into the beautiful garden space you deserve.
Ready to Start Your Patio Transformation?
Get instant access to our complete Patio Garden Resource Library, including detailed project plans, shopping lists, and exclusive design templates.

Discover more from Cozy Corner
Subscribe to get the latest posts sent to your email.