We earn a commission if you make a purchase, at no additional cost to you.
The arrival of spring brings renewed energy to gardens across the country. As winter fades and temperatures rise, your garden awakens with possibility. This season offers the perfect opportunity to transform outdoor spaces into thriving landscapes filled with vibrant flowers and productive vegetable beds.

Successful spring gardening begins well before the first seed touches soil. Proper preparation sets the foundation for a bountiful growing season. Without adequate planning and groundwork, even the most enthusiastic gardeners face disappointing results.
This comprehensive guide walks you through every essential task needed to prepare your garden for spring. From soil preparation to tool maintenance, you’ll discover practical steps that ensure your garden thrives throughout the season. Whether you’re a first-time gardener or have years of experience, this checklist helps you stay organized and confident as you embark on another exciting year of cultivation.
Understanding Spring Garden Timing and Your Growing Zone
Timing determines success in spring garden prep. Every region experiences different climate patterns that dictate when gardening tasks should begin. Understanding your specific growing conditions prevents premature planting and wasted effort.

Finding Your Last Frost Date
The last frost date represents the average date of the final killing frost in spring. This critical information guides your entire spring garden prep timeline. Most gardeners use this date as a reference point for starting seeds indoors and transplanting seedlings outdoors.
Your local agricultural extension office provides reliable last frost date information for your specific area. Online resources and gardening apps also offer frost date calculators based on zip code. Keep in mind that these dates represent averages over many years. Actual weather in any given year may vary.
Cool-weather crops tolerate light frosts and can go into the ground several weeks before the last frost date. Warm weather plants require soil temperatures above fifty-five degrees and should wait until after all danger of frost passes. This distinction shapes your entire spring planting strategy.

Recognizing Early Spring Indicators
Nature provides clues about the right time to begin spring garden work. When forsythia bushes bloom with bright yellow flowers, soil temperatures have typically warmed enough for pea planting. Lilac blooms signal the arrival of safe planting time for warm-weather crops.
Soil condition matters more than calendar dates. When you squeeze a handful of garden soil, it should crumble apart rather than form a wet, sticky ball. Working soil when it’s too wet causes compaction that damages soil structure for the entire growing season. Patience during these early spring days pays dividends later.
Pay attention to consistent weather patterns rather than isolated warm days. A single seventy-degree day in March doesn’t mean spring has truly arrived. Wait for several consecutive days of moderate temperatures before beginning intensive garden prep work.

Cool Weather vs Warm Weather Plants
Understanding plant temperature preferences helps you maximize your growing season. Cool-weather varieties thrive in temperatures between forty and seventy degrees. These plants often bolt or develop bitter flavors when temperatures consistently exceed seventy-five degrees.
Cool weather options include lettuce, spinach, peas, broccoli, cabbage, kale, and radishes. Many gardeners start these crops in early spring, then plant a second crop in late summer for fall harvest. This strategy provides fresh produce during spring and autumn months.
Warm-weather plants require soil temperatures above sixty degrees for successful germination and growth. Tomatoes, peppers, squash, cucumbers, beans, and most flowers fall into this category. Planting these varieties too early results in stunted growth, disease problems, and poor yields.

Assessing and Cleaning Your Garden Beds
Before adding new plants, evaluate the condition of existing garden beds. This assessment reveals problems that need attention and helps you prioritize spring garden prep tasks. A thorough inspection saves time and prevents issues during the growing season.

Removing Winter Debris and Dead Plant Material
Winter leaves behind layers of dead leaves, broken branches, and decomposed plant matter throughout garden beds. While some organic material benefits soil, excessive debris harbors disease spores and pest eggs that threaten spring plants. Remove this material before beginning other prep work.
Start by clearing away any mulch or leaf litter that accumulated over winter. Rake gently to avoid damaging early spring bulbs already emerging from the soil. Dead annual plants from last year should be pulled up completely, including root systems when possible.
Inspect perennial plants for winter damage. Trim away dead stems and foliage, cutting back to healthy growth. Many perennials benefit from this early spring pruning, which encourages vigorous new growth. Add healthy plant debris to your compost pile, but dispose of diseased material in the trash.

Inspecting for Pest Damage and Disease
Early spring garden inspection helps you catch pest and disease problems before they spread. Look for signs of vole tunnels near plant roots. Check wooden raised beds for rot or insect damage. Examine soil for grub populations that might damage plant roots later.
Fungal diseases often overwinter on plant debris and in soil. Watch for powdery residues, unusual discoloration, or spotted patterns on remaining plant material. Remove and destroy affected plants rather than composting them. Consider applying organic fungicides if the disease was severe during the previous season.
Slug and snail populations explode in spring when conditions are moist. Look for their distinctive slime trails around garden beds. Set up beer traps or copper barriers early to reduce populations before they damage tender seedlings. A bit of prevention during spring garden prep saves a lot of frustration later in the season.

Evaluating Garden Bed Edges and Borders
Well-defined garden bed edges prevent grass from invading growing spaces and make maintenance easier throughout the season. Inspect existing edges for areas where lawn grass has encroached into beds. Recut edges using a sharp spade or edging tool, creating a clean line between lawn and garden.
Raised beds require special attention during spring garden prep. Check wooden boards for rot or splitting. Replace damaged sections before filling beds with new soil and plants. Metal and composite raised beds need inspection for sharp edges or loose fasteners that might cause injury.
Consider adding fresh mulch or decorative stone along garden bed borders. This creates an attractive appearance while suppressing weed growth at bed edges. Proper edging reduces the time you’ll spend on maintenance during the busy summer growing season.

Soil Preparation and Testing for Optimal Growth
Healthy soil forms the foundation of successful gardening. Spring garden prep always includes soil improvement activities that enhance fertility, structure, and drainage. Time invested in soil preparation yields benefits throughout the entire growing season.
Conducting a Spring Soil Test
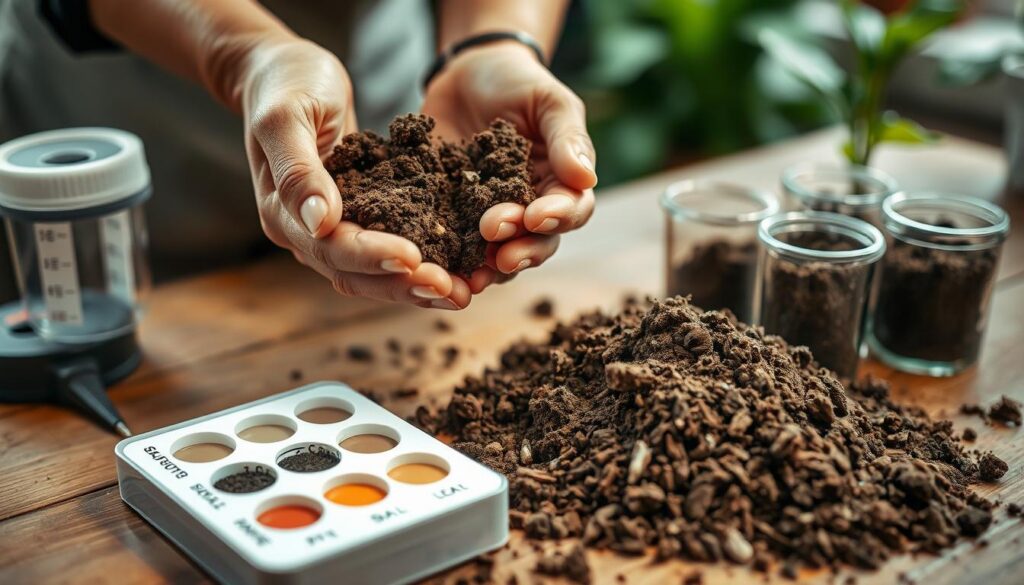
Soil testing removes guesswork from fertilization decisions. A simple test reveals pH levels and nutrient concentrations in your garden soil. This information guides amendment choices and prevents over-fertilization that wastes money and harms plants.
Most university extension services offer affordable soil testing services. Collect soil samples from multiple locations throughout your garden, mixing them together for an accurate representation. Follow the testing lab’s instructions carefully for proper sample collection depth and handling.
Test results typically arrive within two weeks. The report includes pH levels, nitrogen, phosphorus, and potassium concentrations, plus recommendations for amendments. Test your garden soil every three years, or annually if you’re addressing specific problems. Spring represents the ideal time for this task, allowing you to make amendments before planting.

Understanding Soil pH and Amendments
Soil pH affects nutrient availability to plant roots. Most vegetables and flowers prefer slightly acidic to neutral soil with pH between six and seven. When pH falls outside this range, plants cannot absorb certain nutrients even when they’re present in soil.
Acidic soil requires lime to raise pH levels. Apply lime in early spring, giving it time to react with the soil before planting. Alkaline soil needs sulfur or organic matter to lower pH. Wood chips, peat moss, and compost gradually acidify soil over time while improving overall structure.
Make pH adjustments gradually over multiple seasons rather than trying to make dramatic changes quickly. Extreme pH swings stress plants and beneficial soil microorganisms. Follow test recommendations carefully regarding amendment quantities and application timing.
Signs of Healthy Garden Soil
- Dark brown to black color, indicating organic matter
- Crumbly texture that holds together without being sticky
- Earthworm presence throughout the soil profile
- Pleasant, earthy smell without sour or chemical odors
- Good drainage that prevents waterlogging
- Visible organic matter and decomposing material
Common Soil Problems
- Heavy clay that drains poorly and compacts easily
- Sandy soil that cannot retain moisture or nutrients
- Low organic matter results in poor structure
- Compacted layers prevent root penetration
- Nutrient deficiencies cause stunted plant growth
- pH imbalances affecting nutrient availability




Adding Organic Matter and Compost
Organic matter improves every soil type. Clay soils drain better with added compost. Sandy soils retain more moisture and nutrients when you incorporate organic material. Even loamy garden soil benefits from regular organic matter additions.
Spread two to four inches of finished compost over garden beds each spring. Work it into the top six inches of soil using a garden fork or tiller. This practice increases microbial activity, improves soil structure, and provides slow-release nutrients throughout the growing season.
Additional organic matter sources include well-rotted manure, leaf mold, and composted yard waste. Avoid fresh manure, which can burn plants and introduce weed seeds. Allow manure to age for at least six months before application. Fresh materials should go into the compost pile rather than directly into garden beds.

Tilling vs No-Till Garden Preparation
Garden preparation methods spark debate among experienced gardeners. Traditional tilling breaks up compacted soil and incorporates amendments efficiently. However, excessive tilling disrupts soil structure and beneficial microorganism populations. Modern no-till approaches minimize soil disturbance while still achieving excellent results.
If you till, do it only when soil conditions are appropriate. Soil should be moist but not wet. Wait at least a week after rain before operating a tiller. Over-tilling creates fine particles that compact easily and erode during heavy rain. One spring tilling session proves sufficient for most gardens.
No-till gardeners add amendments directly to the soil surface, allowing earthworms and microorganisms to incorporate materials naturally. This method preserves soil structure and protects beneficial organisms. Layer compost, mulch, and other amendments in a thick blanket over beds. Plant directly through this layer into the underlying soil.

Premium Soil Amendments
High-quality compost, aged manure, and organic fertilizers provide essential nutrients while improving soil structure. Look for products labeled OMRI certified for organic gardening. These amendments support healthy microbial populations that benefit plant growth throughout the season.


Soil Testing Kits
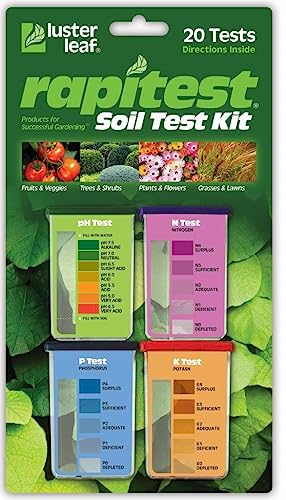
Accurate soil testing equipment helps you understand exactly what your garden needs. Digital pH meters provide instant readings, while comprehensive test kits measure nitrogen, phosphorus, and potassium levels. Regular testing ensures you add only necessary amendments, saving money and protecting the environment.

Organic Fertilizers
Organic fertilizer options include fish emulsion, kelp meal, bone meal, and blood meal. Each provides specific nutrients that support plant health. Slow-release formulations feed plants steadily over several weeks. Choose organic options that improve soil biology while nourishing your crops.
Planning Your Spring Garden Layout and Planting Strategy
Thoughtful planning maximizes garden space and ensures continuous harvests throughout the season. A well-designed layout considers plant spacing requirements, sun exposure, and succession planting opportunities. This preparation step often gets overlooked but dramatically impacts garden success.

Creating a Spring Garden Map
Drawing a garden map helps visualize plant placement before a single seed goes into the ground. Sketch your garden beds to scale on graph paper or use free online garden planning tools. Note dimensions, sun exposure patterns, and water source locations on your map.
Indicate where you’ll place tall plants like tomatoes and pole beans. These crops can shade smaller neighbors if positioned incorrectly. Place tall varieties on the north side of garden beds so they don’t block sunlight from reaching shorter plants. Consider sight lines from your house and outdoor living areas when positioning ornamental flowers.
Your garden map becomes a valuable reference throughout the season. Mark actual planting dates and variety names on the map. This record helps you remember what grew well in each location, supporting better decisions for next year’s spring garden prep.
Implementing Crop Rotation Principles
Crop rotation reduces disease pressure and prevents soil nutrient depletion. Different plant families have varying nutritional needs and attract specific pests. Moving crops to new locations each year interrupts pest and disease cycles that would otherwise intensify over time.
Divide vegetables into families for rotation planning. Tomatoes, peppers, and potatoes belong to the nightshade family. Beans and peas fix nitrogen as legumes. Squash, cucumbers, and melons form the cucurbit family. Lettuce, spinach, and other greens tolerate partial shade and grow quickly.
Plan a three or four-year rotation cycle. Avoid planting members of the same family in the same location for at least three years. Follow heavy feeders like tomatoes with nitrogen-fixing legumes. This strategy maintains soil fertility naturally while reducing fertilizer requirements.

Companion Planting for Spring Garden Success
Certain plants grow better together, while others inhibit each other’s growth. Companion planting arranges plants to take advantage of beneficial relationships. These partnerships can deter pests, improve flavor, and increase yields throughout your garden.
Tomatoes grow well with basil, which may improve tomato flavor while repelling certain insects. Carrots and onions planted together confuse pests that target each crop individually. Marigolds throughout the garden bed deter various insects and add bright color to vegetable spaces.
Avoid planting incompatible combinations. Beans and onions don’t thrive together. Fennel inhibits the growth of most garden plants and should grow in its own area. Research companion planting recommendations for your specific crop selections before finalizing your garden map.
Planning for Succession Planting
Succession planting extends harvest periods and maximizes garden productivity. Rather than planting all lettuce seeds at once, sow small amounts every two weeks. This practice provides continuous harvests instead of overwhelming abundance followed by nothing.
Many spring crops mature quickly, leaving space for summer plantings. After harvesting spring peas in June, plant cucumber seedlings in the same location. Quick-maturing radishes can grow between slower crops like tomatoes, making efficient use of space early in the season.
Mark succession planting dates on your garden calendar. Include notes about which varieties work best for each planting window. Some lettuce varieties tolerate heat better for late spring planting. Specific pea varieties perform well for fall crops. These details improve your garden’s performance year after year.
Cool Season Succession Crops
- Lettuce every 2 weeks
- Radishes every 10 days
- Spinach every 3 weeks
- Carrots every 2 weeks
- Peas in early and late spring
- Beets every 3 weeks
Space-Saving Combinations
- Radishes between tomato transplants
- Lettuce in early spring, peppers after
- Peas in spring, cucumbers in summer
- Spinach under taller plants for shade
- Quick herbs between slow vegetables
- Early greens before warm-weather crops
Beneficial Plant Pairings
- Tomatoes with basil and marigolds
- Carrots with onions and leeks
- Cucumbers with nasturtiums and dill
- Beans with corn and squash
- Lettuce in the shade of tall plants
- Flowers throughout for pollinators
Preparing Garden Tools and Equipment for Spring
Well-maintained tools make spring garden prep easier and more efficient. Dull, rusty, or damaged equipment turns simple tasks into frustrating struggles. A bit of time spent on tool maintenance pays dividends throughout the busy growing season.

Cleaning and Sharpening Hand Tools
Start spring garden prep by cleaning all hand tools thoroughly. Remove caked-on soil using a wire brush or putty knife. Wash tools with soapy water, then dry completely to prevent rust. This simple cleaning reveals hidden damage that needs repair before the busy season begins.
Sharp tools require less effort and cause less fatigue during garden work. Sharpen spades, hoes, and pruning shears using a mill file or sharpening stone. Work in smooth strokes following the original bevel angle. Sharp edges cut cleanly through soil and plant material rather than tearing or crushing.
Apply a light coat of oil to metal surfaces after sharpening and cleaning. Linseed oil or specialized tool oil prevents rust during storage and keeps moving parts working smoothly. Sand wooden handles lightly to remove splinters, then apply linseed oil to preserve the wood and prevent cracking.

Maintaining Power Equipment
Power equipment like tillers and string trimmers requires more extensive spring maintenance. Change oil and replace spark plugs according to manufacturer recommendations. Clean or replace air filters to ensure proper engine performance. Check fuel lines for cracks or deterioration that could cause leaks.
Inspect mower blades for damage or excessive wear. Sharpen blades or replace them if they’re bent or significantly worn. A sharp mower blade cuts grass cleanly, promoting healthy lawn growth. Dull blades tear grass, creating entry points for disease organisms.
Test equipment operation before you need it urgently. Start engines and let them run for several minutes to identify problems that developed during winter storage. Address issues now rather than discovering them when you’re ready to till garden beds or mow paths.

Organizing Garden Supplies and Materials
Spring garden prep includes organizing seeds, fertilizers, pest control products, and other supplies. Check expiration dates on all products. Old seeds lose viability, resulting in poor germination rates. Most vegetable seeds remain viable for three years when stored properly, but some crops like parsnips and onions lose viability after just one year.
Organize supplies by category for easy access during busy spring planting days. Group all seed packets together, sorted by planting date. Keep fertilizers and soil amendments in a dry location away from moisture. Store pest control products in original containers with labels intact, following all safety guidelines.
Take inventory of supplies you need to purchase. Make a shopping list including seeds, transplants, fertilizers, row covers, stakes, and other materials. Shopping early ensures you’ll find the varieties you want before stores run out of popular items.

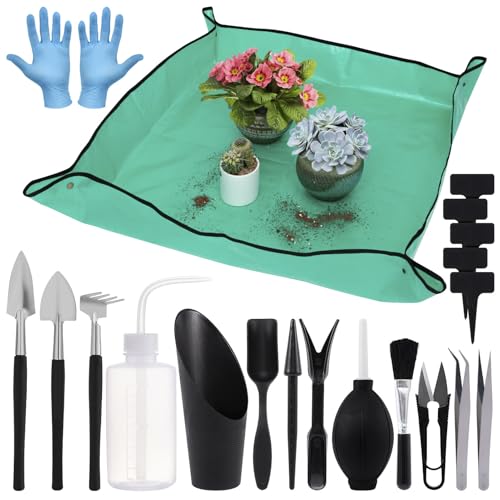
Essential Hand Tools
Quality hand tools last for decades with proper care. Look for forged steel construction with comfortable grips. Essential tools include a sharp garden spade, sturdy rake, reliable hoe, hand trowel, and quality pruning shears. Stainless steel options resist rust and clean easily after use.

Tool Maintenance Supplies
Proper maintenance extends tool life significantly. Stock up on sharpening stones, files, linseed oil, and rust preventative products. A basic maintenance kit costs less than replacing rusty or damaged tools. Regular care keeps equipment functioning smoothly season after season.

Storage Solutions
Organized storage protects tools and supplies while saving time during busy gardening days. Wall-mounted tool racks keep equipment off the ground and readily accessible. Weatherproof bins protect seeds and supplies from moisture. Proper storage prevents damage and makes spring garden prep more efficient.


Starting Seeds Indoors for Spring Transplanting
Starting seeds indoors extends your growing season and provides access to varieties unavailable as nursery transplants. This cost-effective approach lets you grow dozens of plants for the price of a few store-bought transplants. Success requires proper timing, lighting, and care during those critical early weeks.

Calculating Seed Starting Dates
Each crop requires a specific number of weeks indoors before transplanting. Seed packets typically list this information. Count backward from your last frost date to determine when to start seeds. Tomatoes need six to eight weeks indoors. Peppers require eight to ten weeks. Quick-growing crops like lettuce only need four weeks.
Starting seeds too early creates leggy, weak plants that struggle after transplanting. Seedlings ready before outdoor conditions are suitable become rootbound and stressed. Late starts result in plants that haven’t developed enough to thrive when moved outside. Accurate timing produces strong transplants ready to flourish in garden beds.
Create a seed starting calendar for your region. List each crop with its indoor start date and anticipated transplant date. This schedule keeps you organized and prevents forgotten plantings. Many gardeners find that staggering start dates by a week or two provides transplants over a longer period, matching available garden space.

Providing Adequate Light for Seedlings
Light intensity determines seedling quality. Insufficient light produces tall, spindly plants that fall over easily. Window light rarely provides adequate intensity for healthy seedling growth, even in south-facing windows. Supplemental lighting ensures robust, compact plants that transition well to outdoor conditions.
LED grow lights offer energy-efficient, full-spectrum lighting ideal for seedlings. Position lights two to four inches above seedling tops, adjusting height as plants grow. Seedlings need fourteen to sixteen hours of light daily. Use an inexpensive timer to automate lighting schedules and ensure consistency.
Watch for signs of light problems. Seedlings stretching toward light sources need more intensity or longer exposure. Yellow leaves may indicate excessive light or nutrient issues. Purple-tinged leaves on tomato seedlings indicate they need warmer temperatures rather than different light levels.

Maintaining Proper Moisture and Temperature
Consistent moisture proves critical for germination and early growth. Soil should stay moist but never waterlogged. Bottom watering prevents damping-off disease while ensuring even moisture distribution. Place seedling trays in shallow pans of water, allowing soil to absorb moisture from below.
Most vegetable seeds germinate best at temperatures between seventy and eighty degrees. After emergence, slightly cooler temperatures between sixty-five and seventy degrees produce stockier growth. Use heat mats to maintain ideal germination temperatures, especially in cool basements or unheated spaces.
Air circulation prevents fungal diseases that devastate seedlings. Position a small fan nearby to create gentle air movement. This strengthens stems and reduces humidity levels around foliage. Avoid pointing fans directly at delicate seedlings, which can cause excessive drying.

Hardening Off Transplants
Hardening off acclimates indoor-grown seedlings to outdoor conditions. This gradual transition prevents transplant shock that stunts or kills plants. Begin the process one to two weeks before your planned transplant date. The patience required during this period pays off with thriving transplants.
Start by placing seedlings outdoors in a protected, shaded location for a few hours. Gradually increase exposure time and light intensity over seven to ten days. Bring plants indoors if temperatures drop below fifty degrees or strong winds threaten delicate foliage. Monitor soil moisture carefully, as outdoor conditions dry soil faster than indoor environments.
Final hardening off days should expose plants to full sun and outdoor temperatures similar to what they’ll experience in the garden. This final preparation ensures plants can withstand transplanting stress and immediately begin establishing roots in their permanent locations.
Essential Early Spring Garden Tasks
Early spring presents opportunities to complete important garden tasks while the weather remains cool. These activities prepare your space for the busy planting season ahead. Tackling jobs during this window prevents a last-minute rush when planting time arrives.

Pruning Trees and Shrubs
Late winter through early spring offers the ideal window for pruning many trees and shrubs. Deciduous plants remain dormant, making their structure easy to see without foliage. Cuts heal quickly as plants enter their active growth phase. This timing minimizes stress while promoting vigorous new growth.
Remove dead, damaged, or diseased branches first. Make clean cuts just outside the branch collar without leaving stubs. Crossing branches that rub together need removal to prevent damage and disease entry points. Open up dense canopies to improve air circulation and light penetration.
Avoid pruning spring-blooming shrubs like lilac and forsythia until after they finish flowering. These plants set flower buds on old wood during the previous summer. Early spring pruning removes those flower buds, sacrificing the current year’s display. Wait until blooms fade, then prune to shape plants and remove spent flowers.
Dividing Perennials
Early spring division rejuvenates overgrown perennials and creates new plants for other garden areas. Dig clumps when new growth first emerges, but before plants fully leaf out. Use a sharp spade to cut root masses into sections, ensuring each division has both roots and growth buds.
Most perennials benefit from division every three to five years. Daylilies, hostas, and ornamental grasses spread vigorously and may need division more frequently. Division improves flowering and prevents centers from dying out as plants age. Replant divisions immediately at the same depth they grew previously.
Wait to divide fall-blooming perennials until spring. Spring-blooming varieties like iris divide best after flowering finishes. Some perennials resent division and prefer growing undisturbed. Research specific plant requirements before digging to avoid setbacks from improper timing.

Installing Garden Infrastructure
Complete infrastructure projects before planting begins. Install trellises for climbing plants, set up irrigation systems, and position row covers or cold frames. These tasks become much more difficult once plants occupy garden beds. Early installation prevents accidental damage to young plants later.
Tomato cages and plant supports work best when installed at planting time, but preparing them beforehand saves time during busy spring days. Clean and inspect supports for damage. Replace broken stakes or bent cages. Organize materials so they’re ready when needed.
Consider permanent pathways between garden beds. Mulched paths suppress weeds and keep feet dry during wet weather. Stone or brick edging creates attractive, long-lasting borders that define growing spaces. These improvements enhance garden functionality while reducing maintenance throughout the season.
Managing Weeds Before They Spread
Early spring weed control prevents major problems later in the season. Many weeds germinate as the soil warms. Removing them now, before they flower and set seed, dramatically reduces future weed pressure. A bit of effort during spring garden prep saves countless hours of weeding during summer.
Hand-pull weeds when the soil is moist, removing entire root systems. Perennial weeds like dandelions regrow from root fragments left in the soil. Use a weeding knife or dandelion fork to extract deep taproots completely. Add pulled weeds to compost piles unless they’ve gone to seed.
Apply mulch after planting to suppress remaining weed seeds. A three-inch layer of organic mulch blocks light that triggers weed germination. Mulch also moderates soil temperature, retains moisture, and breaks down slowly to improve soil structure. These multiple benefits make mulching an essential spring garden prep task.
Protecting Your Spring Garden from Unpredictable Weather
Spring weather swings between warm, sunny days and unexpected cold snaps. These temperature fluctuations threaten tender plants and can undo weeks of careful preparation. Smart gardeners prepare protection systems before problems arise, ensuring plants survive weather extremes.

Using Row Covers and Cold Frames
Row covers extend the spring growing season by providing frost protection and warming soil. Lightweight fabric covers allow sunlight, air, and water to reach plants while trapping heat. Drape covers over hoops to prevent fabric from touching foliage. Secure edges with soil, rocks, or landscape staples to prevent wind damage.
Cold frames function as miniature greenhouses, creating warm microclimates for early spring plants. Position frames facing south to maximize sun exposure. Vent cold frames on warm days to prevent overheating. Automatic vent openers eliminate the need to manually monitor temperatures throughout the day.
Both protection methods allow earlier planting of cool-season crops. Lettuce, spinach, and peas tolerate cold but grow faster with protection. These covers also shield young plants from wind damage and insect pests. Investment in quality protection pays dividends with earlier harvests and healthier plants.

Preparing for Late Frost Events
Late spring frosts catch many gardeners by surprise. A sudden cold snap after warm weather can devastate tender transplants and damage cold-hardy crops. Monitor weather forecasts closely during spring. Have protection materials ready for quick deployment when frost threatens.
Cover plants with sheets, blankets, or specialized frost blankets when frost is predicted. Support fabric away from foliage using stakes or tomato cages. Remove covers after temperatures rise above freezing the following morning. Even a few hours of protection often makes the difference between survival and loss.
Water plants thoroughly before a predicted frost. Moist soil retains heat better than dry soil. The water releases heat as it cools, moderating temperature drops around plant roots. This simple technique can prevent frost damage without additional covering materials.

Managing Excess Spring Moisture
Spring rain benefits gardens, but excessive moisture causes problems. Waterlogged soil suffocates plant roots and promotes fungal diseases. Poor drainage kills more plants than under-watering during the spring season. Address drainage issues as part of your spring garden prep activities.
Raised beds provide excellent drainage for vegetables and flowers. Build beds at least six inches high, filling them with quality garden soil and compost. Elevating planting areas ensures excess water drains away from plant roots. This benefit proves especially valuable during wet spring weather.
Install drainage solutions in chronically wet areas. French drains, dry creek beds, and grading adjustments redirect water away from planting areas. Rain gardens in low spots capture runoff while supporting plants that tolerate wet conditions. These permanent improvements protect your garden from spring flooding year after year.
Wind Protection Strategies
Spring winds damage tender plants and dry the soil rapidly. Strong gusts break stems, shred foliage, and topple newly planted transplants. Windbreaks reduce these effects while creating calmer growing conditions. Multiple strategies work together to protect vulnerable plants during blustery spring days.
Temporary windbreaks using burlap or shade cloth shield new transplants until they establish. Position barriers on the windward side of garden beds, securing them to sturdy stakes. These temporary structures can be moved or removed as plants mature and weather stabilizes.
Plant permanent windbreaks using shrubs or hedges around garden perimeters. Evergreen options provide year-round protection while deciduous varieties offer spring shelter without excessive summer shade. Space plants appropriately for mature size, allowing several years for windbreaks to reach effective height.
Spring Garden Watering Strategies
Water management during spring differs from summer watering routines. Cool temperatures and frequent rain reduce water needs, but seedlings and transplants still require consistent moisture. Developing good watering habits during spring garden prep prevents problems throughout the season.

Setting Up Efficient Irrigation Systems
Spring represents the ideal time to install or repair irrigation systems. Drip irrigation and soaker hoses deliver water directly to root zones, minimizing waste and reducing disease problems. These systems work automatically with timers, ensuring consistent moisture even when you’re busy with other tasks.
Layout soaker hoses along plant rows before mulching. Cover hoses with mulch to prevent sun damage and reduce evaporation. Position emitters near plant bases rather than in open spaces between plants. This targeted approach uses water efficiently while promoting deep root development.
Test irrigation systems early in spring before planting begins. Check for leaks, clogged emitters, and proper coverage. Make repairs while garden beds are empty and accessible. Properly functioning irrigation saves water, time, and plant stress throughout the growing season.

Watering New Transplants and Seeds
Recently transplanted seedlings need consistent moisture while establishing new roots. Water transplants daily for the first week, then gradually reduce frequency as roots spread. Deep, infrequent watering encourages roots to grow downward rather than staying shallow and vulnerable.
Newly planted seeds require different care. Keep soil consistently moist until germination occurs. Light, frequent watering prevents the soil surface from drying and crusting. Once seedlings emerge, gradually transition to less frequent but deeper watering that encourages strong root development.
Water early in the day when possible. Morning watering allows foliage to dry before evening, reducing disease problems. Avoid overhead watering late in the day, which leaves foliage wet overnight. Consistent moisture without waterlogging produces the healthiest spring plants.

Monitoring Soil Moisture Levels
Learning to assess soil moisture prevents both under- and over-watering. Insert your finger two inches into the soil near the plant roots. Moist soil feels cool and slightly damp without being muddy. Dry soil feels warm and dusty. This simple test provides more accurate information than judging by soil surface appearance alone.
Moisture meters offer objective readings when you’re unsure about soil conditions. These inexpensive tools measure moisture at root depth, taking guesswork out of watering decisions. Probe different locations throughout your garden, as moisture levels vary between sunny and shaded areas.
Adjust watering based on weather conditions and plant growth stages. Spring rain reduces or eliminates irrigation needs. Mulched beds retain moisture longer than bare soil. As temperatures warm and plants grow larger, water needs increase gradually. Stay observant and responsive to changing conditions throughout the spring season.

Spring Pest and Disease Prevention
Preventing pest and disease problems proves easier than controlling established infestations. Spring garden prep includes strategies that reduce pest pressure before it becomes severe. An integrated approach combining cultural practices, physical barriers, and selective treatments keeps gardens healthy naturally.

Identifying Common Spring Garden Pests
Several pests emerge as gardens wake from winter dormancy. Aphids cluster on tender new growth, sucking plant sap and spreading viral diseases. Flea beetles create tiny holes in brassica leaves. Cutworms sever stems of young transplants at the soil level. Early identification allows prompt intervention before populations explode.
Slugs and snails thrive in moist spring conditions. Look for slime trails and ragged holes in foliage. These pests hide under mulch and debris during the day, emerging at night to feed. Hand-picking during evening hours reduces populations significantly. Beer traps and copper barriers provide additional control.
Inspect plants regularly for signs of pest activity. Check leaf undersides where many insects hide and lay eggs. Monitor transplants closely, as pests often attack stressed or damaged plants first. Quick action during the early stages prevents minor problems from becoming major infestations.
Implementing Preventative Measures
Physical barriers stop many pests without chemicals. Row covers exclude flying insects like cabbage moths and flea beetles. Cutworm collars around transplant stems prevent these pests from reaching vulnerable plants. These simple barriers work effectively when installed as part of spring garden prep.
Crop rotation reduces pest populations naturally. Many insects overwinter in soil where host plants grew the previous season. Moving crops to new locations disrupts this cycle. Combining rotation with resistant varieties creates multiple layers of defense against common pests.
Encourage beneficial insects by providing habitat and food sources. Plant flowers throughout the garden to attract predatory insects that consume pests. Allow some herbs to flower, providing nectar for beneficial wasps and flies. These natural predators provide ongoing pest control without any effort after establishment.

Recognizing Disease Symptoms Early
Many plant diseases develop during cool, moist spring weather. Fungal infections appear as spots, wilting, or unusual discoloration. Bacterial diseases cause water-soaked lesions that darken over time. Viral diseases create mottled, distorted growth patterns. Learning to recognize these symptoms enables a quick response before diseases spread.
Remove infected plant material immediately to prevent disease spread. Don’t compost diseased plants, as many pathogens survive the composting process. Dispose of infected material in the trash or burn it if local regulations allow. Sanitize pruning tools between cuts using rubbing alcohol or a bleach solution.
Space plants according to recommended guidelines to ensure good air circulation. Crowded plants stay wet longer after rain or watering, creating ideal conditions for fungal growth. Proper spacing improves air flow and sunlight penetration, keeping foliage drier and healthier throughout the spring season.
Organic Disease Control Options
Several organic treatments control diseases when cultural practices aren’t sufficient. Copper fungicides prevent many fungal and bacterial diseases on vegetables and ornamentals. Apply preventatively before symptoms appear for the best results. Neem oil treats powdery mildew and other common fungal problems while also deterring some insect pests.
Biological fungicides containing beneficial bacteria or fungi compete with disease organisms. Products like Bacillus subtilis prevent diseases through competitive exclusion rather than killing established infections. Apply these products early in the season as part of your integrated disease management strategy.
Baking soda solutions change leaf surface pH, making conditions less favorable for fungal growth. Mix one tablespoon of baking soda with one gallon of water plus a few drops of dish soap. Spray thoroughly, covering all leaf surfaces. Reapply after rain. This simple remedy works surprisingly well for minor fungal problems on many plants.
Developing a Spring Fertilization Program
Proper fertilization supports vigorous spring growth without promoting excessive foliage at the expense of flowers and fruit. Different plants have varying nutritional needs. Understanding these requirements helps you develop an effective fertilization strategy that produces healthy, productive gardens.

Understanding NPK Ratios for Spring
Fertilizer labels display three numbers representing nitrogen, phosphorus, and potassium percentages. Spring applications typically emphasize nitrogen for leafy growth and phosphorus for root development. A balanced fertilizer like ten-ten-ten works well for general garden use. Specialized formulations address specific plant needs.
Nitrogen promotes lush, green foliage growth. Leafy vegetables like lettuce and spinach benefit from higher nitrogen levels. However, excessive nitrogen on fruiting crops produces lots of leaves with few flowers or fruit. Match nitrogen levels to plant type and growth stage for best results.
Phosphorus supports root development and flowering. Apply phosphorus-rich fertilizers when transplanting to encourage strong root establishment. Flowering plants and fruiting vegetables need adequate phosphorus for bud formation. Spring applications provide this critical nutrient when plants need it most.

Applying Slow-Release Organic Fertilizers
Organic fertilizers release nutrients gradually as soil microorganisms break down organic matter. This slow release provides steady nutrition over weeks or months. Spring application of organic fertilizers feeds plants throughout the growing season without risk of burning roots or encouraging excessive growth spurts.
Compost remains the foundation of organic soil fertility. Spring application adds beneficial microorganisms, improves soil structure, and provides complete nutrition in balanced proportions. Two to four inches worked into the top six inches of soil dramatically improves growing conditions for all garden plants.
Specialty organic fertilizers include fish emulsion for quick nitrogen, bone meal for phosphorus, kelp meal for trace minerals, and blood meal for sustained nitrogen release. Combine several products to create custom blends matching your garden’s specific needs. These natural options support soil biology while nourishing plants.

Fertilizing Different Plant Types
Vegetables fall into light, moderate, and heavy feeder categories. Light feeders like beans and peas require minimal fertilization due to their nitrogen-fixing ability. Moderate feeders, including carrots and beets, need balanced nutrition. Heavy feeders like tomatoes, peppers, and squash benefit from regular feeding throughout the growing season.
Perennial flowers and shrubs need spring fertilization to support new growth. Apply slow-release granular fertilizers around the dripline where feeder roots concentrate. Water thoroughly after application to begin nutrient release. Avoid fertilizing too late in spring, which can stimulate soft growth vulnerable to summer stress.
Container plants require more frequent fertilization than in-ground gardens. Frequent watering leaches nutrients from the potting soil rapidly. Use water-soluble fertilizers every two weeks or incorporate slow-release granules into the potting mix at planting time. Container plants show nutrient deficiency symptoms more quickly than garden plants, requiring attentive monitoring.
Recognizing Nutrient Deficiency Symptoms
Plants display specific symptoms when lacking essential nutrients. Yellow leaves often indicate nitrogen deficiency, especially when older leaves yellow first. Purple-tinged foliage may signal phosphorus shortage, particularly in cool spring soil that limits phosphorus availability. Dark green leaves with yellow between veins suggest iron deficiency.
Slow growth and pale color indicate multiple deficiencies or poor soil conditions. Before applying additional fertilizer, consider whether other factors might be responsible. Compacted soil, poor drainage, extreme pH, or root damage can all mimic nutrient deficiency symptoms. Correcting underlying problems proves more effective than adding more fertilizer.
Soil testing eliminates guesswork about fertility needs. Test results indicate which nutrients are deficient and which are adequate. This information prevents wasteful over-application while ensuring plants receive necessary nutrition. Test every three years or whenever plants consistently underperform despite good care.
Mulching Your Spring Garden for Season-Long Benefits
Mulch application ranks among the most beneficial spring garden prep tasks. Proper mulching suppresses weeds, conserves moisture, moderates soil temperature, and improves soil structure as it decomposes. These multiple benefits make mulching a priority for efficient, low-maintenance gardens.

Choosing the Right Mulch Material
Organic mulches decompose over time, enriching soil with organic matter. Wood chips, shredded bark, straw, and leaf mold all function effectively. Each material offers different advantages. Wood chips last longer but decompose slowly. Straw breaks down quickly but may contain weed seeds. Consider your specific needs when selecting mulch types.
Shredded leaves provide free, effective mulch for most garden applications. Run leaves through a mower or shredder to reduce particle size. Whole leaves mat together, preventing water penetration. Shredded leaves allow water and air to reach the soil while still suppressing weeds effectively. They break down within one season, improving soil structure significantly.
Avoid certain mulch materials in vegetable gardens. Fresh wood chips can temporarily tie up nitrogen as they decompose. Dyed mulches may contain unwanted chemicals. Grass clippings heat as they decompose and can damage tender plants. Choose natural, aged materials for vegetable beds, saving decorative mulches for ornamental areas.
Applying Mulch at the Proper Depth
Mulch depth affects weed suppression and moisture retention. Apply three to four inches of organic mulch around established plants and in pathways. Thinner applications allow weeds to penetrate. Excessive depth can smother plants and create habitat for voles and other rodents that damage roots.
Keep mulch away from plant stems and tree trunks. Direct contact encourages rot and disease problems. Leave a two to three-inch gap around stems, creating a mulch-free zone that allows air circulation. This simple practice prevents many common plant health issues.
Wait to mulch until the soil warms in spring. Mulch applied over cold soil insulates it, keeping temperatures cool longer. This delays planting and slows early growth. Apply mulch after transplanting, when the soil has reached appropriate temperatures for each crop type. This timing captures spring warmth while still providing season-long benefits.

Mulching Different Garden Areas
Vegetable beds benefit from straw or leaf mulch that decomposes by season’s end. These materials improve soil for the following year while providing current-season benefits. Avoid woody mulches that compete for nitrogen during decomposition. Apply mulch after plants reach several inches tall so seedlings aren’t smothered.
Perennial beds can use longer-lasting mulches like wood chips or shredded bark. These materials suppress weeds effectively and require less frequent replenishment. Apply fresh mulch each spring to maintain proper depth as older material decomposes. This annual application keeps beds looking neat while continually improving soil.
Pathways need durable mulch that withstands foot traffic. Wood chips work well for main garden paths. Straw provides temporary pathway coverage for seasonal gardens. Fabric landscape barrier under mulch prevents weeds in permanent pathways while still allowing water penetration. Well-mulched paths reduce mud tracking and create attractive, functional garden access.
Living Mulches and Cover Crops
Living mulches use low-growing plants to cover soil between crops. White clover stays low, fixes nitrogen, and suppresses weeds while providing habitat for beneficial insects. This perennial ground cover requires no annual replanting once established. Mow occasionally to keep growth under control and prevent competition with garden plants.
Cover crops planted in the fall and tilled under in the spring provide green manure that improves soil. Winter rye, crimson clover, and annual ryegrass all work well in most climates. These crops prevent erosion, suppress weeds, and add significant organic matter when incorporated. Plan cover crop timing carefully to allow soil preparation before spring planting.
Interplanting quick-growing crops between slower varieties creates a temporary living mulch. Radishes mature before tomatoes need the space. Lettuce grows in the shade of taller plants, covering the soil until main crops fill in. These creative combinations maximize space while providing multiple benefits naturally.
Creating a Spring Garden Maintenance Schedule
A maintenance schedule helps you stay organized during the busy spring season. Regular attention prevents small problems from becoming major challenges. Creating and following a schedule ensures nothing gets overlooked as your garden transforms from bare beds to productive abundance.

Weekly Maintenance Tasks
Weekly garden walks identify problems before they become severe. Check plants for pest activity, disease symptoms, and nutrient deficiencies. Look for weeds beginning to emerge so you can remove them while they’re small. Monitor soil moisture and adjust watering as needed based on weather conditions and plant growth.
Water deeply once or twice per week rather than light daily watering. Deep watering encourages roots to grow downward, creating drought-resistant plants. Check soil moisture before watering to avoid over-watering. Many gardeners water more than necessary, creating weak, shallow-rooted plants susceptible to stress.
Remove faded flowers from ornamental plants to encourage continued blooming. Harvest vegetables frequently to promote continued production. Many crops like beans, peas, and summer squash, produce more prolifically when harvested regularly. Check gardens every few days during peak production to prevent over-mature produce.
Monthly Spring Garden Projects
Each month brings specific gardening tasks that maintain healthy gardens. Early spring focuses on cleanup, soil preparation, and cool-season planting. Mid-spring emphasizes transplanting warm-season crops and establishing support structures. Late spring involves mulching, fertilizing established plants, and monitoring for pest problems.
March tasks include pruning, soil testing, starting seeds indoors, and planting cool-season crops directly in the garden. April brings transplanting of hardened-off seedlings, installing support structures, and continued succession planting of quick crops. May requires transplanting tender warm-season crops, mulching all beds, and implementing pest control measures as temperatures rise.
Adjust this timeline based on your specific growing zone and local weather patterns. Northern gardens run several weeks behind southern regions. High elevation areas experience shorter growing seasons than low elevations at similar latitudes. Create a customized schedule matching your location’s unique conditions for optimal results.
Adapting to Weather Conditions
Flexibility proves essential for successful spring gardening. Cold snaps delay planting even when calendar dates suggest otherwise. Extended wet periods prevent soil work that would cause compaction. Hot spells stress transplants and require additional watering attention. Successful gardeners adapt plans based on actual conditions rather than rigid schedules.
Keep contingency plans ready for weather extremes. Have frost protection materials accessible for sudden cold snaps. Maintain shade cloth for unexpected heat waves that threaten tender plants. Being prepared allows a quick response to protect your investment of time and resources.
Track weather patterns and gardening activities in a journal. Note first and last frost dates, planting dates, and unusual weather events. This historical record becomes invaluable for improving timing and decision-making in future years. Patterns emerge that help you anticipate challenges before they arise.

Extending the Spring Growing Season
Season extension techniques allow earlier planting and later harvests than conventional timing permits. These methods create warmer microclimates that protect plants from cold weather. Implementing season extension strategies significantly increases garden productivity and provides fresh produce over longer periods.

Using Cold Frames Effectively
Cold frames trap solar heat, creating warm growing environments even during cold spring weather. South-facing placement maximizes sun exposure and heat retention. Position frames against buildings or fences for additional wind protection and heat reflection. Proper location doubles the effectiveness of cold frame growing.
Automatic vent openers regulate temperature without constant monitoring. These simple devices expand when warm, lifting the lid for ventilation. Manual venting requires checking frames multiple times daily to prevent overheating. Temperatures can quickly reach dangerous levels on sunny days, cooking plants inside closed frames.
Cold frames extend the season at both ends. Use them for starting seeds four to six weeks before outdoor planting is safe. Grow cold-hardy greens throughout winter in mild climates. Protect tender perennials during cold snaps. These versatile structures offer multiple benefits throughout the gardening year.
Implementing Low Tunnels
Low tunnels use flexible hoops covered with plastic or fabric to create miniature greenhouses over garden beds. They warm the soil and air around plants while providing wind and frost protection. Low tunnels are easy to construct and can be moved to different beds as needed throughout the season.
PVC pipe or wire hoops support covering material at appropriate heights. Space hoops every four to six feet along the bed length. Secure edges of covering material with soil, boards, or ground staples. Proper anchoring prevents wind from displacing covers and damaging plants underneath.
Ventilate tunnels by rolling up one or both ends during warm days. Trapped heat can quickly damage plants on sunny spring days, even when outside temperatures seem moderate. Install thermometers inside tunnels to monitor conditions. Automatic vent systems aren’t practical for low tunnels, making manual monitoring essential.

Selecting Cold-Hardy Varieties
Plant breeding has produced varieties specifically suited for cool conditions. Cold-hardy lettuce tolerates light frost and continues growing in temperatures that stop heat-loving varieties. Specially bred spinach varieties resist bolting during temperature fluctuations common in spring. Choosing appropriate varieties maximizes success with season extension.
Many Asian greens thrive in cool spring weather. Bok choy, mizuna, and tatsoi grow quickly and tolerate cold better than most lettuce varieties. These productive crops provide abundant harvests from early spring plantings. Their unique flavors add diversity to salads and stir-fries.
Root vegetables like carrots, beets, and turnips tolerate frost and actually taste sweeter after light freezing. Plant these crops early for spring harvest or late for fall production. Their cold tolerance makes them ideal for season extension efforts. Many remain harvestable well into winter in protected locations.

Implementing Sustainable Spring Gardening Practices
Sustainable gardening minimizes environmental impact while building healthy, productive gardens. These practices reduce reliance on external inputs, support beneficial wildlife, and create gardens that improve with each passing season. Incorporating sustainability into spring garden prep establishes positive patterns for the entire year.

Building Healthy Soil Ecosystems
Soil teems with life when managed sustainably. Billions of microorganisms, beneficial insects, and earthworms create complex food webs that support plant health. Avoid practices that harm soil biology. Minimize tilling, which disrupts fungal networks and destroys soil structure. Eliminate chemical pesticides that kill beneficial organisms along with pests.
Feed soil organisms with organic matter. Compost, leaf mold, and cover crops provide food that sustains microbial populations. These organisms make nutrients available to plants, improve soil structure, and suppress disease organisms. Building soil biology creates self-sustaining fertility that reduces fertilizer needs over time.
Maintain living roots in soil throughout the year when possible. Cover crops during winter provide continuous food sources for soil life. Perennial plants establish permanent root systems that support beneficial fungi. Even small improvements in soil biology compound over time, creating increasingly productive gardens.
Water Conservation Strategies
Efficient water use conserves resources while supporting healthy plants. Drip irrigation and soaker hoses deliver water directly to roots with minimal waste. Mulching reduces evaporation significantly. These simple practices can reduce water consumption by fifty percent compared to overhead watering methods.
Collect rainwater for irrigation use. Rain barrels capture runoff from roof surfaces, providing free water for gardens. Many areas receive adequate rainfall during spring to meet most irrigation needs when captured and stored properly. Use collected rainwater first, supplementing with municipal water only when necessary.
Group plants with similar water needs together. Mediterranean herbs thrive with minimal water, while lettuce requires consistent moisture. Grouping prevents over-watering drought-tolerant plants while ensuring adequate moisture for thirsty varieties. This strategy simplifies watering and reduces waste from mismatched requirements.

Supporting Pollinators and Beneficial Insects
Gardens depend on pollinators for fruit and seed production. Create a habitat that supports bees, butterflies, and other beneficial insects. Plant flowers throughout garden beds rather than segregating ornamentals and edibles. Early spring blooms provide critical food when few other sources exist. Late-season flowers sustain pollinators into fall.
Provide nesting sites for native bees. Many species nest in hollow stems, bare ground, or wood tunnels. Leave garden areas slightly “messy” with dried plant stalks and bare soil patches. Commercial bee houses support tunnel-nesting species. These simple provisions increase pollinator populations significantly.
Reduce or eliminate pesticide use. Even organic pesticides kill beneficial insects along with pests. Focus on prevention through healthy soil, resistant varieties, and cultural practices. Accept minor pest damage as part of a balanced ecosystem. Gardens with healthy, beneficial insect populations naturally control most pests without intervention.
Reducing Plastic and Waste in the Garden
Gardens generate surprising amounts of waste. Plastic pots, seed trays, and plant labels accumulate over time. Choose reusable containers when possible. Many nurseries accept used pots for reuse. Biodegradable options like paper pots and wooden labels eliminate disposal problems while serving their purpose effectively.
Make your own compost rather than buying bagged products. Composting yard waste and kitchen scraps creates high-quality soil amendment while reducing landfill waste. Start simple with a basic bin or pile. The process requires minimal effort but provides tremendous benefits for both the garden and the environment.
Save seeds from open-pollinated varieties for next year’s garden. Seed saving preserves favorite varieties while eliminating packaging waste and expense. Many crops produce abundant seeds easily saved by home gardeners. This traditional practice connects gardeners to plant cycles while supporting self-sufficiency.
Get Your Complete Printable Spring Garden Prep Checklist
Tracking all spring garden prep tasks becomes simple with a comprehensive checklist. This organizational tool ensures nothing gets overlooked during the busy spring season. A printable checklist provides a handy reference you can take outside while working in your garden.

Download Your Free Spring Garden Prep Checklist
Get instant access to our comprehensive, printable checklist covering every essential spring garden prep task. This detailed guide helps you stay organized and ensures a successful growing season from start to finish. Email Address Download Free Checklist
We respect your privacy. Unsubscribe anytime. The checklist includes month-by-month tasks, planting timelines, and space for personal notes.
Common Spring Garden Mistakes to Avoid
Learning from others’ mistakes saves time, money, and frustration. Certain errors appear repeatedly in spring gardens. Understanding these common pitfalls helps you avoid them in your own gardening journey. Prevention proves far easier than correction once problems develop.
Planting Too Early
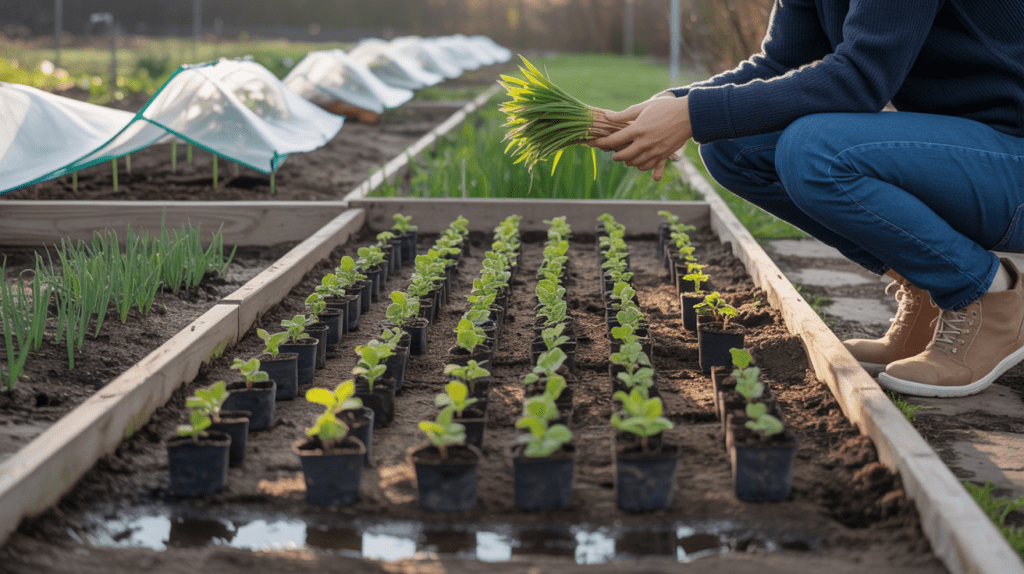
Enthusiasm drives many gardeners to plant before conditions are truly suitable. Cold soil prevents seed germination and stresses transplants. Early planting rarely provides advantages. Plants started at the proper time quickly overtake those struggling in cold conditions. Patience during early spring produces better results than premature planting.
Wait for consistent soil temperatures appropriate for each crop type. Cool-season vegetables tolerate cold, but warm-season crops need temperatures above sixty degrees. Use a soil thermometer to eliminate guesswork. This inexpensive tool provides objective data that guides planting decisions more accurately than calendar dates or wishful thinking.
Watch for natural indicators of proper timing. Blooming forsythia signals pea planting time in many regions. Lilac blooms indicate safe planting for tender crops. Consistent soil warmth and stable weather patterns matter more than hitting specific calendar dates. Local observations trump generic planting calendars every time.
Working Wet Soil
Tilling or digging wet soil causes compaction that damages the structure for years. Compacted soil lacks air spaces needed for root growth and water drainage. This damage persists long after the soil dries. Test soil readiness by squeezing a handful. If it forms a tight ball, wait longer. Crumbly soil that falls apart indicates proper conditions for working.
Raised beds provide insurance against wet spring soil. Fill raised structures with quality soil that drains well, even during wet weather. This elevation allows earlier planting than in-ground gardens. The improved drainage prevents many problems associated with excessive spring moisture.
Plan garden tasks around weather forecasts. Complete soil preparation between rain events when conditions are appropriate. Keep backup projects ready for wet periods when outdoor work isn’t possible. Flexibility prevents the temptation to work soil before it’s ready out of impatience or schedule pressure.
Successful Spring Garden Approaches
- Testing soil moisture before working the ground
- Following the recommended planting dates for your zone
- Hardening off transplants gradually before planting
- Starting with quality soil preparation
- Providing adequate spacing between plants
- Monitoring weather and adjusting plans accordingly
- Using season extension for early crops
- Implementing consistent watering schedules
Common Mistakes That Reduce Success
- Planting before the soil reaches the proper temperature
- Working wet soil causes compaction
- Skipping soil testing and preparation
- Crowding plants to fit more varieties
- Neglecting tool maintenance until needed
- Failing to harden off transplants properly
- Inconsistent watering leading to stress
- Ignoring pest and disease prevention
Overcrowding Plants
Spacing recommendations exist for good reasons. Crowded plants compete for light, water, and nutrients. Poor air circulation increases disease problems. Yields decrease when plants can’t develop properly. Following spacing guidelines produces healthier, more productive plants, even though fewer fit in each bed.
Garden planning prevents overcrowding. Map plant locations before digging, ensuring adequate space for mature sizes. Resist the urge to squeeze in extra plants. Those few additional vegetables rarely justify the reduced productivity of everything else in the bed. Proper spacing actually increases total harvest despite fewer individual plants.
Consider succession planting as an alternative to cramming everything in at once. Multiple small plantings over several weeks provide continuous harvests without overwhelming single large plantings. This approach uses space efficiently while matching production to consumption needs rather than creating overwhelming abundance followed by gaps.
Neglecting Ongoing Maintenance
Gardens require consistent attention throughout the season. Weeds become established when ignored for even a few weeks. Pests multiply rapidly without monitoring. Small disease infections spread quickly through stressed plants. Regular garden walks and minor interventions prevent major problems from developing.
Schedule specific times for garden maintenance rather than waiting for visible problems. Weekly inspections catch issues early when solutions remain simple. Pull emerging weeds before they set seed. Remove diseased leaves before infections spread. Hand-pick pests before populations explode. Consistent small efforts prevent overwhelming tasks later.
Keep tools and supplies accessible to reduce barriers to maintenance activities. Store frequently used tools near the garden. Have pest control products ready for immediate use when needed. Lowering friction between intention and action increases follow-through on maintenance tasks. Garden success depends more on consistent small efforts than on occasional intensive work.
Embracing the Spring Garden Journey
Spring garden prep lays the groundwork for a successful growing season. The tasks outlined throughout this guide work together to create optimal conditions for plant growth. From soil preparation to pest prevention, each activity contributes to overall garden health and productivity.

Start with fundamentals that matter most. Healthy soil supports everything that grows above it. Proper timing ensures plants experience ideal conditions. Consistent care prevents small problems from becoming major challenges. These basics remain constant regardless of specific crops or garden styles.
Remember that gardening skills develop over time through experience and observation. Each season teaches new lessons about your specific growing conditions. Keep notes about what works well and what needs adjustment. This accumulated knowledge becomes your most valuable gardening resource.
Gardens connect us to natural cycles and provide tangible rewards for our efforts. Fresh vegetables, beautiful flowers, and time spent outdoors offer benefits far beyond the harvest itself. Spring garden prep represents an investment in health, beauty, and satisfaction that pays dividends throughout the growing season and beyond.
Begin your spring garden prep with confidence using this comprehensive checklist as your guide. Take tasks one at a time without feeling overwhelmed by the complete list. Progress adds up quickly when you consistently dedicate even small amounts of time to garden preparation. Soon, your well-prepared garden will reward your efforts with vigorous growth and abundant harvests.

Discover more from Cozy Corner
Subscribe to get the latest posts sent to your email.