We earn a commission if you make a purchase, at no additional cost to you.
The holiday season brings a magical opportunity to transform your home with the warm glow of festive lighting. Whether you’re looking to create a winter wonderland in your yard or add a cozy ambiance to your indoor spaces, holiday lighting decor offers endless possibilities to express your creativity and spread cheer. In this comprehensive guide, we’ll explore ten spectacular ways to illuminate your home this season, complete with expert tips, safety considerations, and product recommendations to help you create a display that will dazzle friends, family, and neighbors alike.
1. Outdoor Pathway Lighting: Guide Guests with Festive Illumination

Create a welcoming entrance with strategically placed pathway lights
Transform your walkways into enchanting paths that guide guests safely to your door, adding a magical touch to your holiday lighting décor. Pathway lighting not only enhances your home’s curb appeal but also provides essential illumination during the darker winter evenings.
Materials Needed:
- LED pathway stakes or lanterns (12-24, depending on path length)
- Outdoor-rated extension cords
- Timer or smart plug
- Optional: decorative elements like candy canes or snowflakes
- Waterproof cord covers (for safety)
Installation Steps:
- Map your pathway and measure distances to determine how many lights you’ll need
- Ensure the ground is soft enough for stakes (pre-soften frozen ground if necessary)
- Place stakes at equal intervals (typically 2-3 feet apart) along both sides of the path
- Connect to a power source using outdoor-rated extension cords
- Secure cords with cord covers to prevent tripping hazards
- Set up a timer or a smart plug for automatic operation
Safety Tip: Always use outdoor-rated, UL-listed lights and cords for pathway lighting. Keep connections elevated off the ground or use waterproof connection boxes to prevent water damage.
Time Commitment: 1-2 hours, depending on pathway length
Visual Impact: Pathway lighting creates a welcoming, magical entrance to your home. The soft glow guides visitors while adding depth and dimension to your overall holiday display. For maximum impact, choose lights that complement your home’s architectural style and other outdoor decorations.
Pro Christmas Pathway Lanterns

Top Product Recommendations:

|
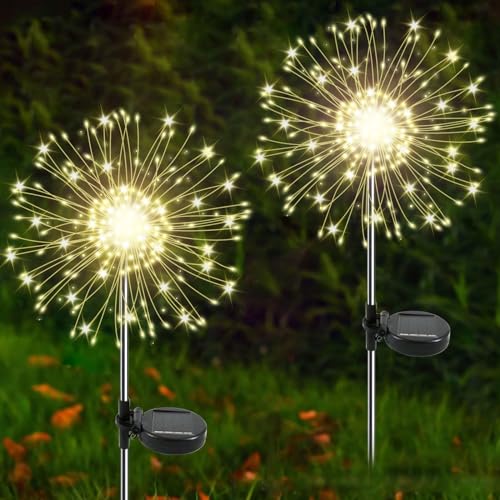
|

|
|
3.5
|
3.5
|
3.5
|
|
|
$11.99
|
|
2. Christmas Tree Lighting Techniques: Create Depth with Layered Illumination

Professional layering creates a tree with depth and visual interest
The secret to a professionally decorated Christmas tree lies in the lighting technique. By layering different types of lights, you can create depth, dimension, and a truly magical display that serves as the centerpiece of your holiday lighting decor.
Materials Needed:
- 3-4 strands of mini LED lights (100 lights each) per foot of tree height
- Optional: 1-2 strands of larger C9 or C7 bulbs for accent
- Optional: specialty lights (twinkle, bubble, etc.)
- Multi-outlet power strip with surge protection
- Light clips or twist ties for securing
- Timer or smart plug
Layering Technique:
- Start with the innermost layer using warm white mini LEDs, wrapping from bottom to top around the trunk and inner branches
- Add a second layer of lights (can be colored or white), working from top to bottom in a spiral pattern
- Add specialty lights as a third layer, focusing on outer branches
- For extra dimension, add larger C9 or C7 bulbs as the final layer on the most visible outer branches
- Connect to a power strip and set a timer for consistent illumination
“The key to a professional-looking tree is working from the inside out with multiple layers of lights. This creates depth that makes the tree appear to glow from within.”
– Jason Woodward, Christmas Designers
Time Commitment: 1-3 hours, depending on tree size and complexity
Visual Impact: A properly layered tree creates a magical, three-dimensional glow that serves as the focal point of your indoor holiday decor. The inner lights create depth while the outer layers add sparkle and definition to ornaments.
Pro Tip: For artificial trees, consider pre-lit options with quality LED lights already perfectly spaced. For natural trees, use 100 lights per foot of tree height for a professional look.
Pro Christmas T5 LED Christmas Lights

Top Product Recommendations:

|

|

|
|
3.5
|
3.5
|
3.5
|
|
$27.99
|
$41.59
|
$37.99
|

3. Window Frame Illumination: Frame Your Holiday Spirit

Window lighting creates a welcoming glow visible from both inside and outside
Framing your windows with string lights creates a beautiful holiday lighting decor effect that’s visible from both inside and outside your home. This technique highlights architectural features while creating a warm, inviting atmosphere that can be enjoyed by everyone passing by.
Materials Needed:
- LED string lights (50-100 lights per window)
- Command hooks or light clips designed for window frames
- Extension cords
- Timer or smart plug
- Optional: suction cup hooks for glass attachment
Installation Steps:
- Clean window frames thoroughly to ensure adhesive hooks stick properly
- Measure and plan light placement, typically 2-3 inches apart for consistent illumination
- Attach command hooks or clips around the window frame perimeter
- Starting from the nearest outlet, begin stringing lights along the frame
- Secure excess cord neatly with additional clips
- Connect to a timer or smart plug for automatic operation
Safety Note: Never use nails or staples to attach lights to window frames, as this can damage the insulation on wires and create fire hazards. Always use proper clips or adhesive hooks rated for holiday lights.
Time Commitment: 20-30 minutes per window
Visual Impact: Window frame lighting creates a warm, welcoming glow that highlights the architecture of your home. The effect is particularly striking when viewed from outside, creating illuminated “frames” that draw the eye and add depth to your overall display.
Top Product Recommendations:

4. Mantelpiece Accent Lighting: Create a Cozy Focal Point

Fairy lights combined with candles create a magical mantel display
The mantelpiece is a natural focal point in many homes, making it the perfect canvas for creating a stunning holiday lighting decor display. By combining fairy lights with candles and other decorative elements, you can transform this space into a magical vignette that captures the essence of the season.
Materials Needed:
- Battery-operated fairy lights (2-3 strands)
- LED flameless candles in varying heights
- Garland or greenery
- Optional: ornaments, figurines, or other holiday decorations
- Optional: timer for battery-operated lights
Styling Steps:
- Start with a base layer of greenery or garland across the mantel
- Weave fairy lights throughout the greenery, concealing the battery pack
- Add flameless candles of varying heights for dimension
- Incorporate ornaments, figurines, or other decorative elements
- Set battery-operated lights on a timer for consistent illumination
“The mantel is where the magic happens. Layering lights at different heights creates depth that draws the eye and invites people to gather around the hearth.”
– Susan Moriarty, Creative Director
Time Commitment: 30-60 minutes
Visual Impact: A well-lit mantelpiece creates a warm, inviting focal point that anchors your living space. The combination of twinkling fairy lights and the gentle glow of flameless candles creates a layered lighting effect that feels both festive and intimate.
Energy-Saving Tip: Use battery-operated lights with timers to automatically turn on at dusk and off after you’ve gone to bed. This saves battery life while ensuring your display is lit during prime evening hours.
National Tree Company Pre-Lit Garland

Top Product Recommendations:

5. Staircase Railing Decoration: Elevate Your Holiday Lighting

Combining lights with greenery creates a stunning staircase display
Transform your staircase into a magical pathway with carefully woven lights along the railing. This holiday lighting decor technique creates a warm, welcoming glow that guides guests through your home while adding a festive touch to an often overlooked area.
Materials Needed:
- LED string lights (50-100 lights per 6 feet of railing)
- Optional: garland or greenery
- Zip ties or floral wire (for secure attachment)
- Extension cord
- Timer or smart plug
Installation Steps:
- Measure your railing to determine how many light strands you’ll need
- If using garland, attach it to the railing first using zip ties every 1-2 feet
- Starting from the nearest outlet, begin weaving lights around the railing in a spiral pattern
- Secure lights with small zip ties or floral wire, keeping connections away from high-traffic areas
- Hide the cord along the railing or wall to reach an outlet
- Set a timer for automatic operation
Safety Consideration: Ensure all cords are secured and don’t create tripping hazards. Keep connections away from children’s reach and never use staples or nails to attach lights to wooden railings.
Time Commitment: 45-90 minutes, depending on staircase size and complexity
Visual Impact: A well-lit staircase creates a magical pathway through your home, drawing the eye upward and connecting different levels of your holiday decor. The combination of lights and greenery adds depth and texture to your overall design scheme.

Top Product Recommendations:


6. Outdoor Tree Wrapping: Illuminate Your Landscape

Properly wrapped trees create a magical winter landscape
Transform your outdoor landscape into a winter wonderland by wrapping trees with weather-resistant lights. This holiday lighting decor technique creates a stunning nighttime display that enhances your home’s curb appeal and brings joy to everyone who passes by.
Materials Needed:
- Commercial-grade outdoor LED string lights (100-300 lights per tree, depending on size)
- Extension cords rated for outdoor use
- Outdoor timer or smart plug
- Optional: light-hanging pole for reaching higher branches
- Optional: outdoor-rated power stake
Wrapping Technique:
- Measure your tree’s trunk and main branches to estimate the light needed
- Start at the base of the trunk, securing the first bulb with the plug facing down
- Wrap lights evenly around the trunk, moving upward with consistent spacing
- When you reach a branch junction, wrap lights 2-3 feet out onto major branches
- For deciduous trees, focus on trunk and branch structure; for evergreens, wrap the entire conical shape
- Connect to an outdoor-rated timer or smart plug
“The secret to professional tree wrapping is consistency. Keep your spacing even and your tension consistent for a clean, polished look that will impress the neighbors.”
– Ben Orr, Northern Seasonal Services
Time Commitment: 1-3 hours per tree, depending on size
Visual Impact: Wrapped trees create stunning silhouettes against the night sky, adding vertical elements to your holiday display. The effect is particularly magical when reflected in snow or when multiple trees create a unified lighting scheme.
Pro Tip: For the most professional look, use 100 lights per 1.5 feet of tree height. This ensures adequate coverage without gaps or overly dense sections.
Top Product Recommendations:

7. DIY Lighted Centerpieces: Brighten Your Holiday Table

Create a magical dining experience with illuminated centerpieces
Elevate your holiday entertaining with DIY lighted centerpieces that bring the magic of holiday lighting decor to your dining table. These versatile creations can be customized to match any style or color scheme while providing a warm, intimate glow for memorable gatherings.
Materials Needed:
- Battery-operated fairy lights (1-2 strands per centerpiece)
- Clear glass vase, bowl, or lantern
- Decorative elements (ornaments, pinecones, berries, etc.)
- Optional: greenery or garland pieces
- Optional: ribbon or decorative wire
Creation Steps:
- Choose a clear container as your base (hurricane vase, mason jar, glass bowl)
- Place the battery pack discreetly at the bottom or outside the container
- Arrange fairy lights throughout the container, creating a base layer of illumination
- Add decorative elements like ornaments, pinecones, or faux snow
- Incorporate greenery around the base or as an accent
- Set lights to steady mode for dining (avoid flashing modes that may distract)
Creative Idea: Fill clear ornaments with fairy lights and hang them at different heights above your table for a magical floating light display. Use fishing line for a nearly invisible suspension effect.
Time Commitment: 30-45 minutes per centerpiece
Visual Impact: Lighted centerpieces create an intimate, magical atmosphere for holiday gatherings. The warm glow illuminates faces around the table while adding a festive sparkle to your dining experience. These versatile creations can be scaled to fit any table size.
Top Product Recommendations:

ZSTBT Submersible LED Fairy Lights
These fully submersible LED lights are ideal for creating stunning centerpieces that incorporate water elements. The thin silver wire is nearly invisible, creating a floating light effect. Each strand features 20 LEDs on a 7-foot wire, accompanied by a compact battery pack.

CYS EXCEL Glass Hurricane Vase Set
This set of three high-quality glass hurricane vases in graduated sizes provides the perfect vessels for creating stunning lighted centerpieces. The clear glass beautifully showcases fairy lights and decorative elements while protecting flames from drafts.

Valery Madelyn 50-Piece Holiday Ornament Collection
This comprehensive collection includes 50 coordinated decorative pieces in traditional red and gold, including shatterproof ornaments, berries, pinecones, and other accents perfect for creating professional-looking centerpieces.
8. Porch or Entryway Lighting: Create a Welcoming First Impression

Combine projection effects with traditional lighting for maximum impact
Your porch or entryway creates the first impression of your home’s holiday spirit. By combining traditional string lights with modern projection effects, you can create a spectacular holiday lighting decor display that welcomes guests and delights passersby.
Materials Needed:
- LED string lights for outlining architectural features
- Light-up figures (reindeer, snowmen, etc.) if desired
- Projection spotlight with holiday patterns
- Outdoor-rated extension cords
- Timer or smart plugs
- Optional: pre-lit wreath or garland
Installation Steps:
- Outline architectural features (columns, railings, door frames) with string lights
- Add a pre-lit wreath or garland around the door
- Position the projection light 10-15 feet from the house for optimal coverage
- Test projection angle and distance to ensure patterns fall where desired
- Add complementary light-up figures if space allows
- Connect all elements to timers or smart plugs for synchronized lighting
Safety Note: Ensure all electrical connections are protected from moisture with weatherproof covers. Keep projection lights secured to prevent tipping in wind or snow.
Time Commitment: 1-2 hours, depending on complexity
Visual Impact: A well-designed porch display creates a welcoming entrance that sets the tone for your entire holiday decor scheme. The combination of traditional string lights with modern projection effects creates depth and visual interest that can be enjoyed from the street.
Top Product Recommendations:

Star Shower Slideshow LED Projector

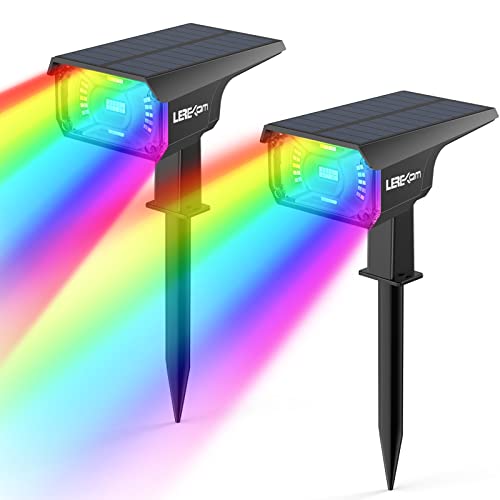
This versatile projector includes 12 holiday slides with festive patterns that can be displayed individually or as a rotating slideshow. The weather-resistant housing includes easy installation and an automatic timer fu

National Tree Company Pre-Lit Holiday Wreath

This 36-inch pre-lit wreath features 100 warm white LED lights, realistic pine branches, and decorative accents including pinecones, berries, and a red bow. Battery-operated with a timer function for hassle-free display.

Kasa Outdoor Smart Plug
This weatherproof smart plug features two independently controllable outlets, allowing you to manage multiple lighting elements from your smartphone. Create schedules, control remotely, and even use voice commands through Alexa or Google Home.
9. Bookcase or Shelf Accent Lighting: Highlight Your Holiday Displays

Mini lights transform ordinary shelves into magical holiday displays
Transform your bookshelves or display cabinets into enchanting holiday vignettes with strategically placed mini lights. This often-overlooked holiday lighting decor technique creates cozy illuminated spaces to showcase your favorite seasonal collectibles and decorations.
Materials Needed:
- Battery-operated mini LED light strands (20-50 lights per shelf)
- Command hooks or clear tape for securing
- Holiday figurines, ornaments, or collectibles
- Optional: miniature trees or bottle brush trees
- Optional: faux snow or cotton batting
Styling Steps:
- Clear shelves of everyday items or incorporate them into your holiday display
- Add a base layer of cotton batting or faux snow if desired
- Position battery packs at the back of shelves where they’ll be hidden
- Weave lights along the back edge of shelves, then forward around display items
- Arrange holiday figurines, ornaments, and decorative elements
- Set battery-operated lights on a timer for consistent illumination
Creative Idea: Create miniature winter villages on each shelf with tiny houses, figurines, and bottle brush trees illuminated by hidden fairy lights. Add a mirror “ice skating rink” with small skater figurines for extra charm.
Time Commitment: 1-2 hours, depending on the number of shelves
Visual Impact: Illuminated shelves create magical vignettes that showcase your holiday collections while adding a warm, ambient glow to your room. The effect is particularly striking in the evening when the main lights are dimmed.
Top Product Recommendations:

Govee Battery Operated String Lights
These flexible copper wire lights feature 50 warm white LEDs on a 16-foot ultra-thin wire that can be shaped around objects. The compact battery pack includes 8 lighting modes and a timer function for convenient operation.


KUUQA Mini Sisal Christmas Trees

This set of 24 miniature bottle brush trees in various sizes (1-3 inches) and colors creates instant charm for shelf displays. The wooden bases provide stability, and the variety allows for creating depth in your miniature scenes.

Lenox Miniature Village Collection

These high-quality porcelain miniature houses feature LED illumination and intricate details that create magical shelf displays. Each piece is battery-operated and designed to be collectible, allowing you to expand your village over time.
10. Outdoor Roof Line Illumination: Frame Your Home in Light

C9 lights create a classic, professional roof line display
Nothing says “holiday spirit” quite like a home with a beautifully illuminated roof line. This classic holiday lighting decor technique frames your home’s architecture and creates a stunning silhouette against the night sky that can be enjoyed by the entire neighborhood.
Materials Needed:
- Commercial-grade C9 LED bulbs and socket wire
- Roof clips appropriate for your roofing material
- Extension cords rated for outdoor use
- Outdoor timer or smart plug
- Optional: light installation pole
- Safety equipment: sturdy ladder, non-slip shoes, helper
Installation Steps:
- Measure your roof line to determine how many lights you’ll need (typically 12″ spacing)
- Plan your installation to minimize visible cords and maximize impact
- Attach clips to the roof edge at consistent intervals
- Secure the light strand in clips, working in sections from one electrical outlet
- Add lights to other architectural features like gables and dormers if desired
- Connect to an outdoor-rated timer or smart plug
Safety Warning: Roof line installation can be dangerous. Consider hiring professionals if you’re uncomfortable with heights or don’t have proper safety equipment. Never install lights in wet or windy conditions, and always have a spotter when using a ladder.
Time Commitment: 3-6 hours, depending on home size and complexity
Visual Impact: Roof line lighting creates a classic holiday silhouette that defines your home’s architecture and creates a focal point for your entire outdoor display. The clean lines and even spacing of C9 bulbs provide a professional look that enhances curb appeal.
“The key to professional-looking roof line lighting is consistency. Even spacing, straight lines, and proper clips make all the difference between an amateur and professional installation.”
– Jason Woodward, Christmas Designers
Top Product Recommendations:

Adams Christmas C9 All-in-One Clips
These versatile clips work with all C9 bulbs and can attach to shingles, gutters, or fascia boards. The UV-resistant plastic construction withstands harsh weather conditions, and the design prevents damage to roofing materials while providing secure attachment.
Maintenance and Storage: Preserving Your Holiday Lighting Investment

Proper storage extends the life of your holiday lighting decor
Quality holiday lighting decor represents a significant investment that can bring joy for many seasons when properly maintained and stored. Follow these expert tips to extend the life of your lights and make next year’s decorating process smoother.
Maintenance Tips:
- Inspect all light strands before installation, checking for damaged bulbs or frayed wires
- Replace any damaged bulbs immediately to prevent further issues
- Keep connections elevated or covered to prevent water damage
- Use timers to reduce unnecessary run time and extend bulb life
- Gently remove dust from indoor decorations with a soft cloth before storage
Storage Solutions:
- Wind lights around cardboard squares, plastic reels, or purpose-made light storage reels
- Store each strand in individual bags or containers to prevent tangling
- Label containers clearly with contents and the location used
- Store in a cool, dry place away from extreme temperatures
- Keep battery-operated items separate and remove batteries before storage
- Store projection lights in their original boxes with foam inserts if possible
Pro Tip: Take photos of your displays before dismantling them. These visual references will make next year’s setup much faster and help you remember which lights go where.
Recommended Storage Products:

TreeKeeper Light Storage Reels
These durable plastic reels feature a hand crank for easy winding and can hold up to 100 feet of light strands. The center storage compartment keeps plugs and extra bulbs organized, while the stackable design maximizes storage space.

Sterilite Weathertight Storage Totes
These high-quality storage containers feature a gasket seal and a latching lid that keeps moisture, dust, and pests away from your holiday lighting investments. The clear design allows you to see contents at a glance, while the stackable format maximizes storage space.

Zober Premium Wreath Storage Container
This specialized storage container protects delicate pre-lit wreaths from crushing and tangling. The tear-resistant material and reinforced handles ensure durability, while the clear window allows you to identify contents without opening.

Illuminate Your Holidays with Confidence
Creating magical holiday lighting decor doesn’t require professional expertise—just thoughtful planning, quality materials, and attention to detail. By implementing these ten lighting techniques, you can transform your home into a festive wonderland that brings joy to your family and neighbors alike.
Remember that holiday lighting is an investment that can bring returns for many seasons when you choose quality products and care for them properly. Start with one or two areas this year, then expand your display in future seasons as your confidence and collection grow.
Whether you prefer the classic warmth of traditional lighting or the endless possibilities of smart technology, the most important element is the personal touch that makes your holiday lighting decor uniquely yours. Let your creativity shine as brightly as your lights this holiday season!
Ready to Transform Your Home This Holiday Season?
Explore our selection of holiday lighting products to create displays that will dazzle for years to come.


Discover more from Cozy Corner
Subscribe to get the latest posts sent to your email.