Summer gatherings bring joy to any home. Your backyard can become the perfect entertaining space without draining your savings account. The secret lies in smart planning and creative solutions that maximize impact while minimizing costs.
Many homeowners believe beautiful outdoor spaces require professional landscaping and expensive materials. That assumption keeps countless yards looking plain and uninviting. The truth is different.
Budget-friendly transformations can create stunning results that impress family and friends. Simple projects using everyday items and basic DIY skills make remarkable changes possible. These cheap backyard ideas prove that style and savings can work together perfectly.
We earn a commission if you make a purchase, at no additional cost to you.





Create Ambiance With String Lights

String lights transform any outdoor space into a magical evening retreat. These affordable lighting options create instant ambiance that impresses guests from the moment they step outside. The warm glow turns ordinary yards into enchanting gathering spaces.
Installation takes minimal time and requires few tools. Most string lights come with everything needed for quick setup. Homeowners can hang them between trees, along fence lines, or across pergola beams.
The versatility of string lights makes them perfect for any backyard design. They work beautifully over dining areas, around conversation spaces, or along pathways. The soft illumination extends usable hours into the evening.
Choosing the Right String Lights
LED options provide energy efficiency and long-lasting performance. These bulbs use less electricity than traditional incandescent versions. Many LED string lights last for thousands of hours before requiring replacement.
Weather-resistant models are designed to withstand rain, wind, and temperature fluctuations. Look for outdoor-rated products with proper insulation and sealed connections. Quality string lights endure multiple seasons without deterioration.
Length and bulb spacing affect the final appearance. Measure your space before purchasing to ensure adequate coverage. Standard spacing ranges from 12 to 18 inches between bulbs for balanced lighting.

Installation Tips
- Use heavy-duty outdoor hooks or eye screws for secure mounting points
- Plan the layout on paper before hanging to visualize the pattern
- Create gentle swoops rather than tight, straight lines for visual interest
- Test all bulbs before final installation to identify any defects
- Keep electrical connections protected from ground moisture
Creative Hanging Ideas
- Zigzag pattern across open patio spaces for full coverage
- Vertical drops from pergola beams for a curtain lighting effect
- Wrapped around porch columns for architectural accent
- Draped along fence tops to define space boundaries
- Strung through tree branches for natural integration
Solar-powered string lights eliminate electrical costs. These options charge during daylight hours and illuminate automatically at dusk. They work perfectly for areas without convenient outlet access.
Build an Affordable DIY Fire Pit

Fire pits create focal points that draw people together naturally. These gathering spaces extend backyard usability into cooler evenings. Building one costs far less than pre-made models while offering complete customization.
Simple designs, such as those using concrete blocks or stacked stone, require no special skills. The basic construction involves creating a circular wall with fire-resistant materials. Most DIY fire pits take just a few hours to complete.
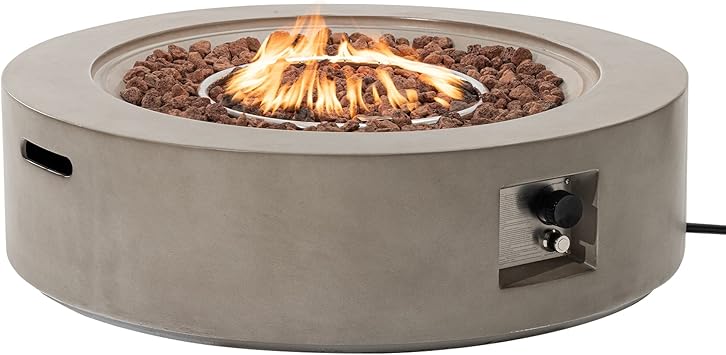
Materials and Construction
Concrete retaining wall blocks provide the easiest building option. These affordable items stack without mortar for quick assembly. A standard fire pit uses approximately 30 to 40 blocks, depending on size.
Natural stone creates a more rustic aesthetic for traditional landscape designs. Fieldstone or flagstone pieces fit together like puzzles. The irregular shapes add character while maintaining structural integrity.
Fire brick lines the interior for enhanced heat resistance. This protective layer prevents damage to outer materials from intense temperatures. Fire brick costs slightly more but significantly extends pit longevity.
Safety First: Always check local regulations before building a fire pit. Many areas require specific clearances from structures, property lines, and overhead obstacles. Obtain necessary permits to ensure compliance with fire codes.
Finishing Touches
Gravel or pea stone creates a practical base around the pit. This fire-resistant ground cover prevents grass damage and provides stable seating areas. The material costs little and spreads easily.
Comfortable seating arrangements encourage longer gatherings around the fire. Arrange chairs in a complete circle for inclusive conversation spaces. Weather-resistant options withstand outdoor conditions between uses.
- Position the fire pit at least 10 feet from buildings and overhanging branches
- Create a 3-foot diameter inner circle for optimal flame containment
- Stack blocks or stones 12 to 18 inches high for safety
- Add a metal fire ring insert for easier cleaning and maintenance

Craft Stylish Pallet Furniture

Wooden pallets offer incredible potential for outdoor furniture projects. These free or cheap materials transform into functional seating, tables, and planters. The rustic wood aesthetic suits various design styles from farmhouse to contemporary.
Sourcing pallets requires minimal effort in most areas. Many businesses discard them regularly and welcome removal. Always select heat-treated pallets marked with “HT” rather than chemically treated versions.
Popular Pallet Projects
Sectional sofas provide comfortable seating for multiple guests. Stack pallets to the desired height and secure with wood screws. Add outdoor cushions for comfort and visual appeal.
Coffee tables require just one or two pallets, depending on size preferences. Sand the surface smooth and add casters for mobility. A coat of weather-resistant stain or paint protects the wood.
Vertical planters maximize growing space in small yards. Stand pallets upright and fill spaces with potting soil. Herbs, flowers, and small vegetables thrive in this arrangement.
Sofa Design

Stack two pallets for seat height. Add a third pallet vertically for the backrest. Secure all connections with exterior wood screws for stability.
Coffee Table

Use a single pallet as-is or cut to preferred dimensions. Attach industrial casters underneath for easy movement. Apply a protective finish for outdoor durability.
Vertical Planter

Stand the pallet vertically and staple the landscape fabric to the back. Fill compartments with quality potting mix. Plant flowers, herbs, or succulents in each opening.
Finishing and Maintenance
Sanding prevents splinters and creates smooth surfaces for sitting or touching. A power sander speeds the process significantly. Focus especially on areas where skin contact occurs regularly.
Weather-resistant finishes protect wood from moisture and sun damage. Exterior paint, stain, or sealant extends furniture life considerably. Reapply protective coatings every 1 to 2 years for best results.
Outdoor cushions add comfort and inject color into pallet furniture designs. Choose fade-resistant fabrics designed for exterior use. Remove cushions during harsh weather to maintain their appearance.
Design a Vibrant Container Garden

Container gardens bring life and color to any outdoor space. These portable plant displays work perfectly for renters or homeowners wanting flexibility. Planters cost less than in-ground landscaping while offering easier maintenance.
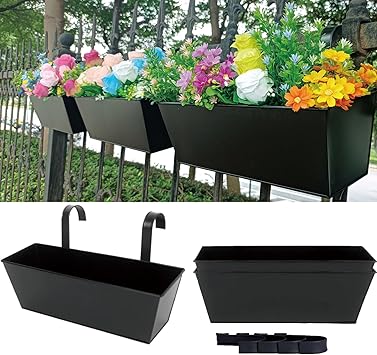
The variety of container options suits every budget and style preference. Terra cotta pots provide classic appeal at minimal cost. Repurposed items like galvanized buckets or wooden crates add unique character.


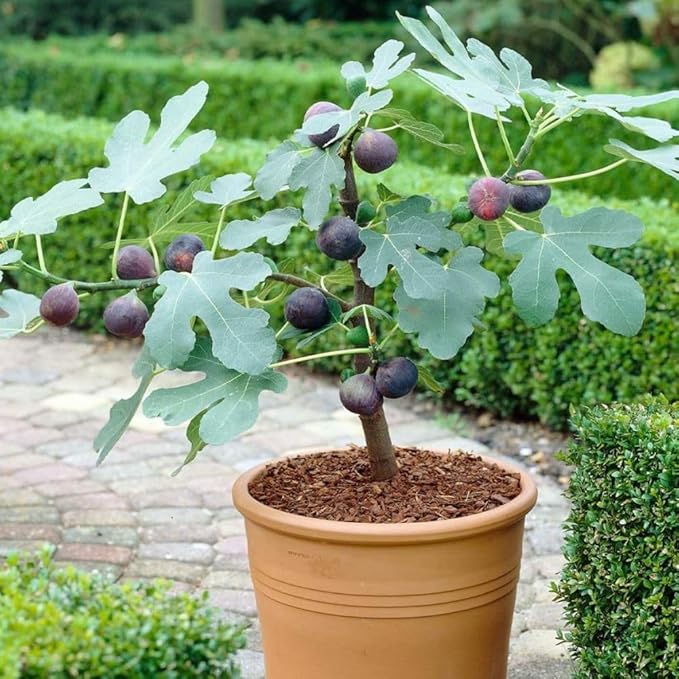


Selecting Containers and Plants
Drainage holes prevent waterlogged soil that damages plant roots. Drill holes in the bottom of containers lacking proper drainage. Elevate planters slightly on pot feet or bricks for better water flow.
Size matters when matching containers to plant needs. Larger planters provide more soil volume for root growth and moisture retention. Small containers dry out quickly and require more frequent watering.
Color coordination creates visual harmony across multiple planters. Choose a palette of 2 to 3 complementary colors for a cohesive design. Repeat these colors throughout different containers for a unified appearance.
Best Plants for Containers
- Petunias provide continuous blooms throughout the summer months
- Herbs like basil and rosemary offer beauty and culinary benefits
- Coleus adds vibrant foliage color in shaded areas
- Succulents require minimal water and thrive in hot conditions
- Dwarf shrubs provide structure and year-round interest
- Ornamental grasses add movement and textural contrast
Budget Container Ideas
- Galvanized metal buckets from farm supply stores
- Wooden crates lined with plastic for moisture protection
- Painted plastic nursery pots for colorful displays
- Repurposed food-grade containers with added drainage
- Concrete mix poured into molds for custom shapes
- Thrift store ceramic bowls and vessels
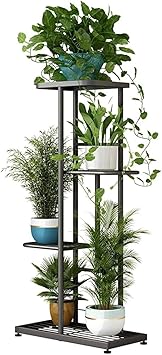
Group containers in odd numbers for more pleasing arrangements. Place taller planters behind shorter ones for depth. Vary heights using plant stands or stacked materials.
Soil and Care Requirements
Quality potting mix makes an enormous difference in plant health and growth. Garden soil compacts in containers and restricts root development. Invest in a proper potting mix formulated for container growing.
Fertilizer needs increase for container plants compared to garden beds. Frequent watering washes nutrients from the soil more rapidly. Apply balanced liquid fertilizer every 2 to 3 weeks during the growing season.
Watering schedules depend on plant types, container sizes, and weather conditions. Most containers need water when the top inch of soil feels dry. Morning watering prevents fungal issues and ensures moisture throughout hot days.
Add an Outdoor Rug for Instant Style

Outdoor rugs define spaces and add comfort underfoot instantly. These affordable accessories transform plain concrete or wood decks into stylish rooms. The right rug pulls together furniture and creates a cohesive design.
Weather-resistant materials withstand rain, sun, and foot traffic effectively. Polypropylene and polyester fabrics resist fading and mildew. These synthetic options clean easily with soap and water.
Choosing the Perfect Rug
Size determines how well a rug anchors the furniture arrangement. The rug should extend beyond furniture edges by at least 12 to 18 inches. All furniture legs should rest on the rug for proper proportion.
Pattern and color selections impact the overall outdoor aesthetic significantly. Bold patterns make strong statements in neutral spaces. Subtle designs complement already colorful areas without overwhelming the senses.
Texture adds another dimension to outdoor floor covering. Flatweave rugs work best in high-traffic areas. Textured options feel luxurious but require more maintenance to keep clean.
- Easy to clean with a hose or a pressure washer
- Dry quickly after rain or cleaning
- Stack easily for seasonal storage
- More affordable pricing overall
- Works well in covered and open areas
- Provide a softer feel underfoot
- Add visual depth and interest
- Better sound absorption qualities
- Create a more luxurious appearance
- Best suited for covered patios
Placement matters for both function and appearance. Center the rug under the main seating arrangements. Leave even spacing on all sides for a balanced look.
Maintenance Tips
Regular vacuuming or sweeping removes dirt and debris. This simple maintenance prevents buildup that becomes harder to clean. Weekly attention keeps rugs looking fresh throughout the season.
Spot cleaning addresses spills and stains before they set permanently. Use mild soap and water for most issues. Avoid harsh chemicals that might damage rug fibers or colors.
Proper storage during the winter months extends rug life significantly. Clean thoroughly before storing in a dry location. Roll rather than fold to prevent permanent creases.
Transform Concrete with Paint

Plain concrete patios and walkways look dull and uninviting. Paint transforms these surfaces into attractive features at minimal cost. The project requires just a weekend and basic supplies for dramatic results.
Concrete paint withstands foot traffic and weather when properly applied. Specialized formulas bond to concrete surfaces and resist peeling. The finish lasts several years before requiring touch-ups.
Preparation and Application
Surface preparation determines paint adhesion and longevity. Clean concrete thoroughly, removing all dirt, oil, and debris. Power washing provides the most effective cleaning for outdoor concrete.
Etching opens concrete pores for better paint penetration. Muriatic acid solution or commercial concrete etcher creates a slightly rough texture. This step proves essential for lasting results.
The primer coat ensures even coverage and improved durability. Concrete primer seals the surface and provides a base for the topcoat. Allow full drying time before applying colored paint.

Design Ideas
- Solid color provides a clean, modern foundation
- Geometric patterns add visual interest and style
- Stenciled designs mimic expensive tile work
- Faux stone finish creates a natural appearance
- Border patterns frame outdoor spaces elegantly
Color Selection Tips
- Light colors reflect heat in sunny areas
- Dark tones hide dirt between cleanings
- Multiple colors create dimension and depth
- Test samples before committing to large areas
Sealer protects painted surfaces from wear and weather damage. Apply clear concrete sealer after the paint fully cures. Reapply sealer annually for continued protection.
Pattern Creation Techniques
Painter’s tape creates clean lines for geometric designs. Mark patterns carefully before applying tape. Press edges firmly to prevent paint bleeding underneath.
Stencils offer intricate designs without the artistic skills required. Secure stencils completely flat against the concrete surface. Use a foam roller or stencil brush for controlled application.
Freehand painting allows complete creative freedom for unique designs. Sketch patterns with chalk before committing to paint. This approach works well for organic or irregular patterns.
Create Affordable Shade Solutions

Summer heat makes unshaded outdoor spaces uncomfortable during peak hours. Shade structures extend usable time in backyard areas significantly. Budget-friendly options provide relief without expensive permanent installations.
Temporary shade solutions offer flexibility for changing needs and seasons. These options install quickly and remove easily. The portability allows adjustment based on the sun angle throughout the day.
Shade Structure Options
Shade sails create modern architectural elements overhead. These triangular or rectangular fabrics attach to posts or existing structures. UV-resistant material blocks harmful rays while allowing air circulation.
Cantilever umbrellas provide adjustable coverage for specific areas. The offset design keeps the pole out of the center for better furniture arrangement. Quality models withstand wind when properly weighted.
Pergolas offer semi-permanent shade with classic appeal. Simple wood construction costs less than pre-made kits. Adding climbing plants increases shade density over time.
DIY Shade Projects
Canvas drop cloths make an inexpensive canopy material. These painters’ supplies cost far less than purpose-made shade fabric. Grommets added to the corners allow easy attachment to supports.
Bamboo screening attaches to existing pergolas or fences. The natural material provides filtered light and a tropical aesthetic. Reed fencing offers similar benefits at comparable prices.
Outdoor curtains hung from a cable or rod create flexible shade walls. Waterproof fabric withstands weather while adding softness to hard landscapes. Draw curtains as needed for privacy or sun protection.

Shade Sail
Blocks up to 95% of UV rays. Modern aesthetic suits contemporary designs. Requires secure anchor points. Installation takes a few hours with basic tools.

Cantilever Umbrella
Adjustable for changing sun angles. Folds away when not needed. Available in various sizes and colors. A heavy base is required for stability in the wind.
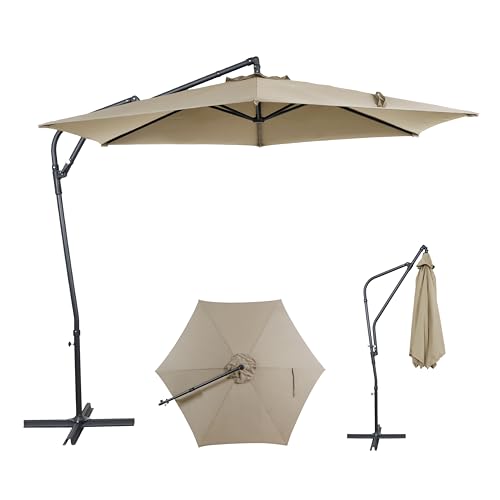

Pergola with Vines
A semi-permanent structure adds property value. Climbing plants increase shade density. Creates a room-like outdoor space. Requires basic carpentry skills to build.
Install Solar Pathway Lights

Pathway lighting improves safety while enhancing nighttime ambiance. Solar options eliminate electrical costs and complicated wiring. These lights charge during the day and illuminate automatically after dark.
Installation requires no special skills or tools. Simply push stakes into the ground along desired paths. The independence from electrical systems allows placement anywhere in the yard.

Choosing Solar Lights
Brightness levels vary significantly between different solar light models. Lumens measure light output objectively. Pathway lights typically range from 5 to 15 lumens per fixture.
Battery capacity determines how long the lights remain illuminated nightly. Higher-capacity batteries provide longer runtime. Quality models stay lit for 8 to 10 hours on full charge.
Durability matters for products exposed to weather year-round. Look for stainless steel or heavy-duty plastic construction. Waterproof ratings ensure functionality through rain and snow.
Placement Strategies
Spacing affects both functionality and aesthetics of pathway lighting. Place lights every 6 to 8 feet along walkways for adequate illumination. Closer spacing creates brighter paths for heavily used areas.
Stagger lights on alternating sides rather than straight lines. This pattern provides better coverage while looking more natural. The zigzag arrangement guides movement effectively.
Highlight landscape features with strategic light placement. Position fixtures to illuminate favorite plants, trees, or garden elements. This dual-purpose approach maximizes lighting investment.
Installation Tips
- Choose locations receiving direct sunlight for 6-8 hours daily
- Soften the ground with water before inserting stakes in hard soil
- Keep solar panels free from leaf debris and snow
- Replace batteries every 1-2 years for optimal performance
- Clean panels monthly with a soft cloth and water
Design Applications
- Line the main walkways from the driveway to the front door
- Mark the edges of garden beds for nighttime visibility
- Illuminate steps and changes in elevation for safety
- Create ambient lighting around the patio perimeter
- Define property boundaries along fence lines
Craft Unique Planters from Repurposed Items

Repurposed containers add personality to outdoor spaces while reducing costs. Everyday items gain new life as unique planters. This creative approach combines sustainability with a distinctive style.
The possibilities extend far beyond traditional flower pots. Kitchen items, furniture pieces, and vintage finds all work beautifully. Each repurposed planter tells a story and creates conversation.

Finding the Perfect Items
Thrift stores offer treasure troves of potential planters. Old colanders, teapots, and buckets cost just a few dollars. The patina and wear add authentic character to garden displays.
Yard sales provide larger items like chairs, dressers, and wheelbarrows. These pieces make dramatic statement planters. Negotiate prices late in the day for the best deals.
Home storage areas often hide forgotten items perfect for planting. Old boots, baskets, and toolboxes wait for creative reuse. This approach costs absolutely nothing while clearing clutter.
Kitchen Items
- Colanders provide built-in drainage holes
- Tea kettles add whimsical charm
- Enamelware withstands outdoor conditions
- Mixing bowls work for small plants
Furniture Pieces
- Old chairs hold single pots in seats
- Dresser drawers create tiered displays
- Wooden crates stack for vertical gardens
- Ladders support multiple small pots
Vintage Finds
- Watering cans serve dual purposes
- Rubber boots add playful elements
- Metal toolboxes provide rustic appeal
- Wooden wheelbarrows make focal points


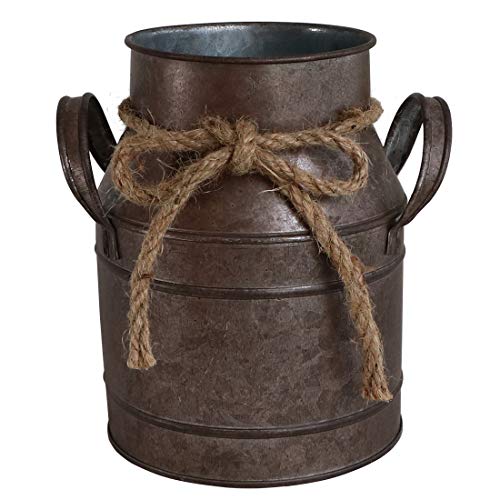


Preparing Repurposed Planters
Drainage prevents root rot in sealed containers. Drill holes in the bottom if none exist naturally. Use appropriate drill bits for metal, ceramic, or wood.
Cleaning removes dirt and potential contaminants from previous uses. Scrub thoroughly with soap and water. Rinse completely and allow full drying time.
Sealing extends the life of porous materials like wood or unglazed ceramic. Apply waterproof sealer to interior surfaces. This protection prevents moisture damage over time.

Planting and Display
Layer materials inside deep containers for proper drainage. Place small rocks or pottery shards in the bottom. Add landscape fabric before potting soil to prevent soil loss.
Group repurposed planters by theme or color for cohesive displays. Mix various sizes and heights for visual interest. Odd-numbered groupings create pleasing arrangements.
Consider plant proportions relative to container size. Top-heavy plants need stable bases. Trailing varieties work beautifully, overflowing from unusual containers.
Design a Low-Maintenance Rock Garden

Rock gardens provide stunning visual impact with minimal ongoing care. These landscape features suit difficult areas where grass struggles. The combination of stones and drought-tolerant plants creates interest year-round.
Initial investment remains modest when using locally sourced materials. Many landscape supply yards sell bulk stone at reasonable prices. Smaller decorative rocks cost more but create specific design elements.
Planning Your Rock Garden
Site selection influences plant choices and overall success. Sunny slopes with good drainage work ideally for rock gardens. These conditions suit the majority of rock garden plants.
Scale matters when selecting stones for the space. Larger areas accommodate bigger boulders as focal points. Small gardens look better with more uniform, smaller stones.
Color combinations create different moods and styles. Earth tones provide natural, calming effects. Mixing gray, tan, and rust-colored stones adds depth and dimension.
Stone Selection and Placement
Local stone typically costs less than imported varieties. Native materials also look more natural in regional landscapes. Visit stone yards to see options before purchasing.
Varying sizes create more interesting compositions than uniform stones. Include some large anchor pieces with medium and small sizes. This variety mimics natural rock formations.
Bury stones partially rather than placing them on the surface. One-third underground looks more established and natural. This technique also improves stability.
Best Rock Garden Plants
- Sedum varieties offer color and texture diversity
- Creeping thyme spreads between stones with fragrant foliage
- Hens and chicks create interesting rosette patterns
- Ornamental grasses add movement and height
- Creeping phlox provides colorful spring blooms
- Alpine plants thrive in rocky conditions
Design Principles
- Create natural-looking groupings rather than rows
- Position larger stones as anchors first
- Leave planting pockets between stone placements
- Use edging to define garden boundaries
- Add a pathway through larger rock gardens
- Mulch between stones for weed suppression
Planting and Maintenance
Soil preparation ensures healthy plant establishment. Mix sand or gravel into heavy clay for improved drainage. Rock garden plants generally prefer lean soil over rich mixtures.
Plant placement should consider mature sizes and growth habits. Allow adequate space for spreading varieties. Taller plants work best as backdrops or among larger stones.
Maintenance requirements stay minimal once established. Remove occasional weeds and dead foliage annually. Most rock garden plants need little water after the first season.
Install Charming Window Boxes

Window boxes bring garden beauty to vertical spaces. These elevated planters create curb appeal without requiring yard space. The installation transforms plain windows into charming focal points.
Building custom window boxes costs less than purchasing pre-made versions. Basic carpentry skills and standard lumber create perfectly sized boxes. Paint or stain matches existing home colors.
Building Window Boxes
Cedar or redwood naturally resists rot and insect damage. These woods cost more initially but last many years untreated. Pine offers a budget-friendly alternative when sealed properly.
Size specifications depend on window dimensions and plant selections. Standard depths range from 6 to 8 inches. Length typically extends slightly beyond the window width for proper proportion.
Drainage holes prevent waterlogged soil that damages both plants and wood. Drill several holes in the bottom before assembly. Space holes every 4 to 6 inches along the length.
Construction Steps
- Measure the window and cut lumber to the determined dimensions
- Assemble the box using exterior wood screws and waterproof glue
- Drill drainage holes in the bottom panel before final assembly
- Sand all surfaces smooth to prevent splinters
- Apply exterior paint or stain for weather protection
- Install mounting brackets securely into wall studs
- Hang the box and verify the level before planting

Planting Window Boxes
Quality potting mix ensures healthy root development in confined spaces. Garden soil compacts and restricts drainage in containers. Lightweight potting mix provides an ideal growing medium.
Thriller, filler, spiller formula creates professional-looking displays. Choose one tall centerpiece plant as a thriller. Add fuller plants as fillers. Include trailing varieties as spillers over edges.
Color schemes should complement home exterior colors. Monochromatic displays look sophisticated and elegant. Complementary color combinations create vibrant, eye-catching boxes.
Thriller Plants
- Geraniums provide height and color
- Spike plant adds dramatic vertical element
- Fountain grass creates movement
- Canna lilies make bold statements
Filler Plants
- Petunias bloom continuously all summer
- Calibrachoa offers smaller petunia-like flowers
- Impatiens thrive in shady window boxes
- Coleus provides colorful foliage
Spiller Plants
- Ivy creates a classic trailing effect
- Sweet potato vine adds bold foliage
- Trailing lobelia produces tiny flowers
- Bacopa offers delicate cascading blooms
Maintenance and Care
Watering needs increase in window boxes compared to ground gardens. Elevated positions and confined soil dry faster. Daily watering often becomes necessary during hot weather.
Fertilizing every two weeks maintains vibrant blooms throughout the season. Water-soluble fertilizer mixed at half strength prevents burning. Consistent feeding keeps plants producing flowers continuously.
Deadheading removes spent flowers and encourages new blooms. Pinch off faded flowers regularly for a tidier appearance. This simple task significantly extends the flowering period.
Enhance Beds with Fresh Mulch

Fresh mulch instantly refreshes tired landscape beds. This simple addition makes an enormous visual impact for a modest investment. The material serves practical purposes while improving overall appearance.
Mulch types vary in cost, color, and longevity. Shredded hardwood bark offers excellent value and attractive color. Pine straw costs less in some regions and suits specific design styles.
Benefits of Mulching
Moisture retention reduces watering frequency during dry periods. A mulch layer slows evaporation from the soil surface. This conservation saves time and water bills.
Weed suppression minimizes maintenance time in garden beds. Thick mulch blocks light needed for weed seed germination. Fewer weeds mean less time spent on hands and knees.
Temperature moderation protects plant roots from extreme heat and cold. Mulch insulates soil, maintaining more consistent temperatures. This stability promotes healthier root systems.
Application Techniques
Depth matters for effectiveness without causing problems. Apply 2 to 3 inches for optimal weed control and moisture retention. Deeper layers can suffocate plant roots or retain excessive moisture.
Keep mulch away from plant stems and tree trunks. Direct contact promotes rot and disease issues. Leave several inches of space around woody stems.
Edge definition creates a crisp, professional appearance. Install landscape edging before mulching for clean lines. The barrier also prevents mulch from spreading into lawn areas.
Organic Mulch Options
- Shredded hardwood bark lasts 1-2 years before breaking down
- Pine bark nuggets provide long-lasting coverage
- Cedar mulch repels some insects naturally
- Pine straw works well in acidic-loving plant beds
- Cocoa hulls smell pleasant, but cost more
- Leaf compost improves soil while mulching
Coverage Calculation
Calculate cubic yards needed before purchasing bulk mulch. This formula ensures adequate material without waste.
- Measure bed length and width in feet
- Multiply length times width for square footage
- Divide square footage by 100
- Multiply the result by the desired depth in inches
- Divide the final number by 3 for cubic yards needed
Color Selection
Natural brown tones complement most landscape styles. These earthy colors recede visually, allowing plants to shine. Brown mulch works universally across different design aesthetics.
Black mulch creates a dramatic contrast against bright flowers and foliage. The dark color makes plant colors pop vibrantly. This choice suits contemporary landscape designs particularly well.
Red mulch offers a bold statement in landscape beds. The color enhances brick homes and complements certain flower colors. Use sparingly as an accent rather than throughout the entire yard.
Create a Space-Saving Vertical Garden

Vertical gardens maximize growing space in small yards. These upward designs create living walls of plants and flowers. The innovative approach adds greenery without sacrificing precious ground area.
DIY vertical garden systems cost far less than commercial versions. Simple materials like pallets, gutters, or pocket organizers work perfectly. Creative solutions transform walls and fences into productive gardens.
Vertical Garden Systems
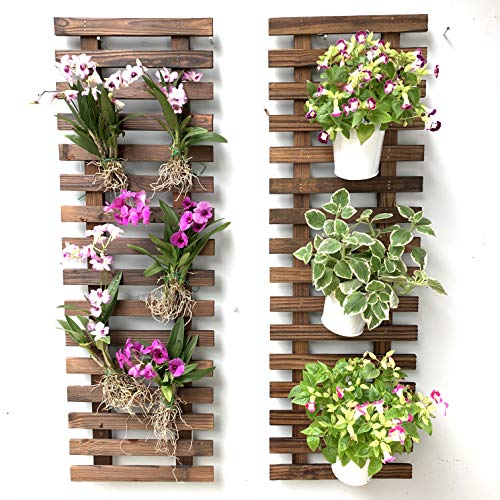
Pallet gardens offer rustic charm and easy construction. Stand pallets upright and staple landscape fabric to the back. Fill spaces between slats with soil and plant directly.
Gutter gardens work excellently for herbs and shallow-rooted plants. Mount sections of vinyl guttering horizontally at varying heights. Drill drainage holes before planting.
Pocket planters hang conveniently from walls or fences. Fabric shoe organizers designed for closets work perfectly outdoors. Fill pockets with potting mix and small plants.

Pallet Garden
Free or cheap materials make this budget-friendly option. Works for herbs, succulents, and small flowers. Requires sturdy mounting to the wall or fence.

Gutter Garden
Perfect for lettuce, herbs, and strawberries. Easy to install with basic brackets. Provides good drainage when properly prepared.

Pocket Planter
Inexpensive fabric organizers work great outdoors. Holds many plants in a small footprint. Best suited for annual flowers and herbs.
Plant Selection
Shallow-rooted varieties thrive in limited soil depth. Herbs like basil, cilantro, and parsley grow excellently vertically. Most lettuce varieties also adapt well to vertical systems.
Trailing plants create beautiful cascading effects. Strawberries produce fruit while vining attractively. Nasturtiums provide edible flowers and foliage.
Succulents withstand dry conditions common in vertical gardens. These low-maintenance plants create living art installations. Mix varieties for interesting color and texture combinations.
Installation and Care
Secure mounting prevents accidents from the weight of soil and water. Locate wall studs for proper support. Use appropriate hardware rated for outdoor use and expected weight.
Watering needs careful attention in vertical systems. Gravity pulls water downward, affecting lower plants more. Water the upper sections first, allowing excess to drain to lower levels.
Fertilizing becomes especially important in limited soil volumes. Apply diluted liquid fertilizer weekly during the growing season. The frequent watering leaches nutrients more rapidly than ground gardens.
Define Spaces with Creative Edging

Landscape edging creates definition between different yard areas. These borders give gardens a polished, professional appearance. The right edging material controls grass spread while adding visual interest.
Budget-friendly edging options range from natural materials to recycled items. Stone, brick, and wood all create effective borders economically. Creative solutions using repurposed materials add unique character.
Edging Material Options
Natural stone provides timeless appeal and incredible durability. Fieldstone or river rock creates informal, organic edges. Flat stones are stacked for a more formal appearance.
Brick edging offers a classic look suitable for traditional landscapes. Salvaged bricks cost little or nothing from demolition sites. Set bricks at angles for interesting patterns.
Wood timbers work well for raised bed edges. Landscape timbers or thick boards last several years. Cedar and redwood resist rot better than pine.
- Extremely durable, lasting decades
- Natural appearance blends with landscapes
- No maintenance required once installed
- Higher initial material cost
- Heavy and labor-intensive to install
- Works for curved or straight edges
- Classic appearance suits many home styles
- Often available for free or very cheaply
- Moderate weight easier to work with
- Can shift over time, requiring adjustment
- Offers numerous pattern possibilities
- Best for straight or gently curved edges
- The least expensive option initially
- Easy DIY installation
- Creates clean, straight lines
- Eventually, rots require replacement
- Works well for raised bed edges
- Treated lumber lasts longer but costs more
Installation Methods
Proper preparation ensures straight, level edging installation. Mark desired an edge line with a string or garden hose. Dig a narrow trench following the marked line.
Depth depends on edging material and desired appearance. Most edging sets are partially below ground for stability. Bury one-third to one-half of the material height.
Backfill and tamp soil firmly around the installed edging. This anchoring prevents shifting from mower bumps or frost heave. Add mulch or soil to fill any gaps.
Creative Alternatives
Recycled bottles create colorful, whimsical borders. Bury bottles upside down halfway into the soil. Mix bottle colors or use a uniform color for different effects.
Bamboo sections offer a tropical aesthetic at minimal cost. Cut thick bamboo into uniform lengths. Install vertically for a picket fence appearance.
Concrete pavers provide clean lines and permanence. Shop end-of-season sales for deep discounts. Partially bury for mowing strip functionality.
Add a Simple Water Feature

Water features add soothing sounds and movement to outdoor spaces. These elements create focal points that attract birds and beneficial insects. Simple designs cost less than elaborate pond systems while providing similar benefits.
Container water features suit small spaces and tight budgets perfectly. Large pots, barrels, or basins become miniature water gardens. The self-contained systems require minimal maintenance once established.
Container Fountain Basics
Watertight containers form the foundation of simple fountains. Ceramic pots, plastic tubs, or metal basins all work well. Ensure containers have no cracks or drainage holes unless plugged.
Small submersible pumps circulate water, creating movement and sound. These devices cost between twenty and fifty dollars. Solar-powered options eliminate electrical requirements.
Decorative elements personalize each fountain uniquely. Stacked stones, driftwood, or pottery add visual interest. Position the pump beneath decorative items for hidden mechanics.
Assembly Steps
- Select a watertight container of the desired size
- Place the submersible pump in the container bottom
- Thread pump tubing through decorative elements
- Arrange stones or other features around the pump
- Fill the container with water to the specified level
- Test pump flow and adjust as needed
- Add aquatic plants if desired for a natural look

Plant Additions
Aquatic plants enhance beauty while benefiting water quality. Water lettuce and hyacinth float on the surface, creating a natural appearance. These plants filter water naturally.
Marginal plants grow in shallow water around edges. Marsh marigold and water iris provide colorful blooms. Place these plants in submerged pots for easy arrangement.
Surrounding plants integrate fountains into landscape design. Moisture-loving varieties like ferns appreciate proximity to water. The combination creates lush, cohesive garden vignettes.
Maintenance Requirements
Water levels need monitoring, especially during hot weather. Evaporation reduces volume, requiring regular refilling. Top off weekly or as needed to maintain pump coverage.
Pump cleaning prevents clogging and extends equipment life. Remove and rinse the pump monthly during the operating season. Clear debris from the intake screen for optimal performance.
Winter preparation protects fountains in cold climates. Drain completely and store the pump indoors. Turn containers upside down or move to protected locations.
Set Up an Outdoor Movie Screen

Outdoor movie nights create memorable summer entertainment experiences. This setup transforms backyards into personal theaters under stars. The installation costs little but delivers a big impact for guests.
Simple solutions work as effectively as expensive dedicated screens. White sheets or painter’s drop cloths serve as projection surfaces. The temporary setup stores easily between movie nights.
Screen Creation
Canvas drop cloths provide affordable, durable screen material. These painters’ supplies cost less than twenty dollars. The neutral color reflects projected images clearly.
PVC pipe frames create sturdy support structures for screen fabric. Simple designs assemble and disassemble quickly. The lightweight material stores compactly in a garage or a shed.
Alternatively, hang fabric directly from a fence, garage, or between trees. Use grommets and rope for secure attachment. This approach requires minimal setup time.
Equipment Needs
Projectors range widely in price and quality. Budget models starting around one hundred dollars produce adequate images. Ensure sufficient brightness rating for outdoor use.
Sound systems enhance the viewing experience significantly. Bluetooth speakers pair easily with projectors or laptops. Position speakers on either side of screen for balanced audio.
Power requirements determine equipment placement options. Extension cords reach most backyard locations safely. Consider battery-powered projectors for complete portability.
Creating Atmosphere
- String lights around the viewing area for pre-show ambiance
- Arrange comfortable seating with outdoor cushions and blankets
- Set up a snack station with popcorn and movie treats
- Provide insect repellent for guest comfort
- Time start for after sunset for the best image visibility
Practical Considerations
- Test equipment before guests arrive
- Have a backup power source available
- Check the weather forecast and have a rain plan
- Keep the screen material taut for the clearest image
- Position seating appropriate distance from the screen size
Seating Arrangements
Layered seating accommodates various comfort preferences. Place lawn chairs in the back rows for those wanting back support. Spread blankets and cushions in front for casual lounging.
Adequate spacing between seating prevents crowding. Allow room for people to move without disturbing others. Create a center aisle for easy access.
Consider sight lines when positioning seating. Ensure everyone has a clear view of the screen. Raise screen height if needed for unobstructed viewing.
Transform Your Backyard This Summer

These fifteen cheap backyard ideas prove beautiful outdoor spaces need not drain savings accounts. Each project offers practical solutions that create impressive results. The combination of creativity and budget-consciousness transforms ordinary yards into extraordinary gathering places.
Start with one or two projects matching your skill level and available time. Simple additions like string lights or container gardens provide immediate visual impact. Build confidence through small successes before tackling larger undertakings.
Remember that personal style matters more than following trends. Choose ideas resonating with your aesthetic preferences and lifestyle needs. The best backyard reflects the people enjoying the space.
Summer entertaining becomes effortless when outdoor areas invite guests naturally. These budget-friendly improvements create comfortable, attractive spaces where memories form. Your backyard potential awaits activation through thoughtful, affordable enhancements.

Discover more from Cozy Corner
Subscribe to get the latest posts sent to your email.